
Introduction
Welcome back to Part 3 of our “Windows 365: From Zero to Hero” series! In this post, we’ll cover key features to help streamline your Cloud PC management. First, we’ll walk through dynamic security groups, which simplify policy management and automate tasks. Then, we’ll explore Windows Autopatch, which automates updates to keep your Cloud PCs up to date and secure.
While i had high hopes for maintenance windows when they where announced, they are currently a bit of a disappointment due to their limited support.
We’re holding off on screenshot and picture protection for this post to keep things digestible, but it’s on the way soon so stay tuned for that in a future post! Let’s dive in and simplify your Windows 365 management even further!
Lets get Started
Dynamic Security Groups for Cloud pc’s
Dynamic security groups in Intune automatically manage group memberships by adding or removing devices based on specific criteria, like device properties or configurations. This automation is particularly helpful for streamlining the assignment of policies and apps, especially in larger environments where manual updates can be cumbersome.
In this guide, I’ll walk you through creating two dynamic security groups: one for all your Cloud PCs, and another for Cloud PCs with a specific provisioning profile. For the demo, we’ll focus on the group for all Cloud PCs, but you can choose the specific one depending on your use case if you just want to follow along with the blog post you only need the create the first dynamic security groups.
Dynamic Security Group All Cloud Pc’s
Sign in to Microsoft Intune Admin Center:
- Go to Groups > New Group.
Group Configuration:
- Set Group type to Security.
- Name the group (e.g., “All Cloud PCs”) and add a description like “A dynamic device group containing all Cloud PC devices.”
- Set Membership type to Dynamic Device.

Set Dynamic Query:
- Select Add dynamic query.
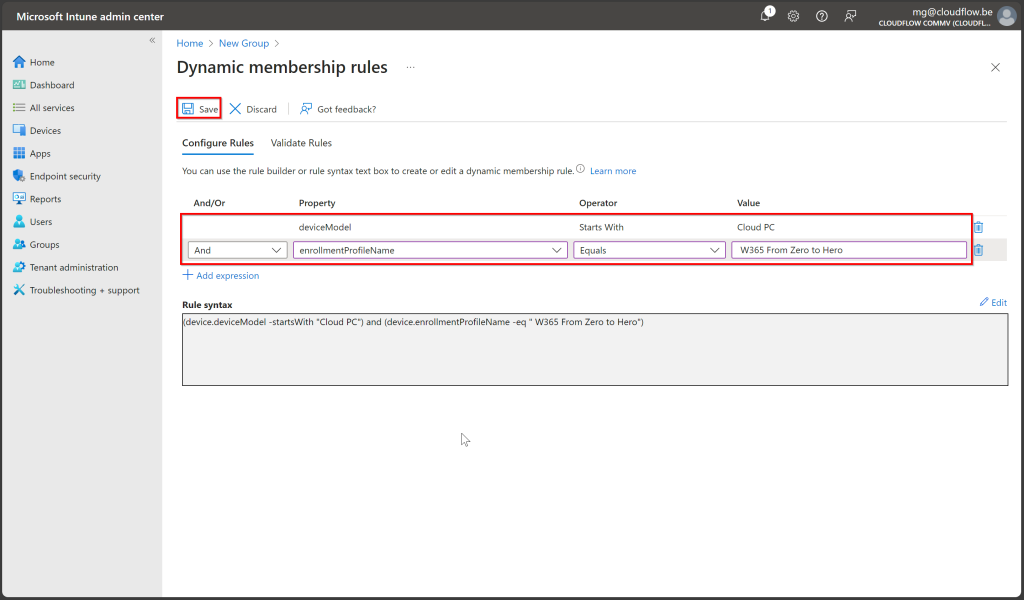
- On the Dynamic membership rules page, set the following:
- Property:
deviceModel - Operator:
Starts With - Value:
Cloud PC.
- Property:

Validate & Create:
- Validate the rule by selecting Validate Rules (Preview) and adding Cloud PCs for testing.
- Click Save > Create.
Dynamic Security Group Specific Enrollment Profile
Group Configuration:
- Set Group type to Security.
- Name the group (e.g., “Cloud PCs with W365 From Zero to Hero”) and add a description.
- Set Membership type to Dynamic Device.

Set Dynamic Query:
- Select Add dynamic query.
- On the Dynamic membership rules page, set:
- Property 1:
deviceModel→ Operator:Starts With→ Value:Cloud PC. - Property 2:
deviceEnrollmentProfileName→ Operator:Equals→ Value:W365 From Zero to Hero.
- Property 1:
Validate & Create:
- Validate the rule with Validate Rules (Preview).
- Click Save > Create.
This dynamic group will now automatically include Cloud PCs with both the “W365 From Zero to Hero” profile and the Cloud PC model.
Setting Up Windows Autopatch for Your Cloud PCs
In the previous part, we set up Windows 365 without using additional services like Windows Autopatch. If you opt not to use Autopatch, you can still manage updates manually through Windows Update Rings and assign security groups to handle updates across devices. However, this can become a complex, time-consuming process.
Windows Autopatch simplifies this by automating the update process, ensuring your Cloud PCs are always updated with the latest patches, security updates, and app versions—without the need for manual configuration. This service manages Windows updates, Microsoft 365 apps, drivers, and firmware for you, providing:
- Automated Updates: No need for manual scheduling or group management. Autopatch handles everything in the background.
- Enhanced Security: Ensures your Cloud PCs receive the latest updates and security patches promptly, reducing the risk of vulnerabilities.
- Reduced Complexity: Removes the hassle of configuring update rings and security groups for different sets of devices.
Once Autopatch is enabled, you’ll create an update group specifically for your Windows 365 PCs. Then, we’ll update the enrollment profile to ensure Windows Autopatch manages all updates for your Cloud PCs.
Enabling Windows Autopatch
- Sign in to Microsoft Endpoint Manager:
- Navigate to Tenant Administration:
- In the left-hand menu, select Tenant Administration.
- Select Windows Autopatch:
- Scroll down and choose Windows Autopatch from the options.
- Enable Autopatch:
- Follow the on-screen instructions to enable Windows Autopatch for your tenant.
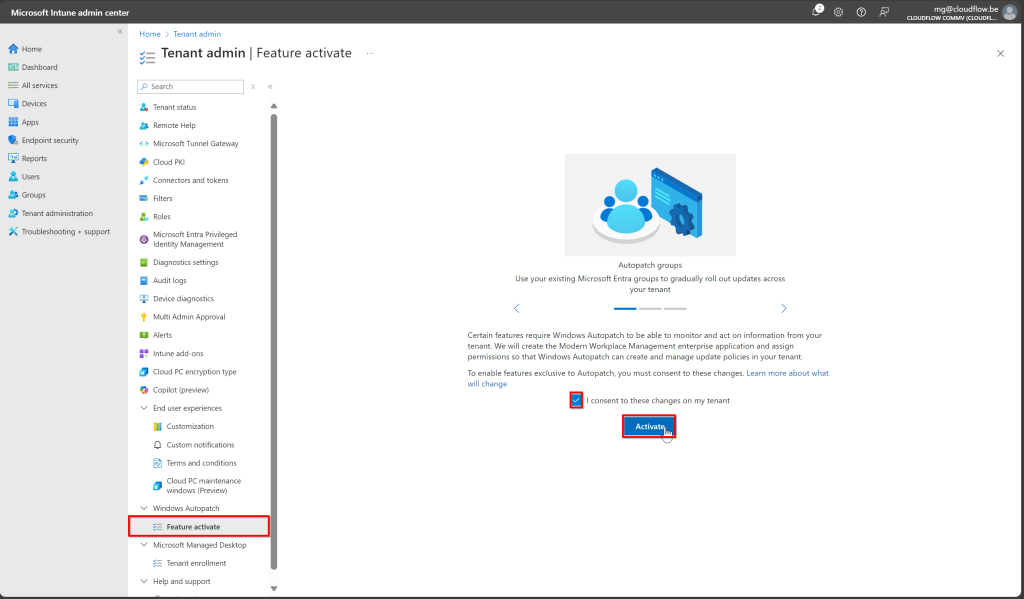
Once enabled, Autopatch may take some time to fully configure.
What Are Deployment Rings?
Deployment rings allow you to control how updates are rolled out across devices in stages, ensuring that updates are tested with smaller groups before being applied more broadly. This phased approach helps reduce the risk of disruptions caused by updates, as issues can be identified early in smaller rings. For example, you might start with Ring 1 (20% of devices), followed by Ring 2 (30%), and finally Ring 3 (50%) for broader deployment.
By default, Autopatch creates Test and Last rings, which can’t be deleted, but we won’t be using those in this setup. Instead, we’ll focus on creating custom dynamic rings for your Cloud PCs.
Step-by-Step: Creating Custom Windows Autopatch Deployment Rings
Windows Autopatch will handle the updates, ensuring that your Cloud PCs receive updates in a phased, controlled manner. This staged approach minimizes risks and provides a smoother update process.
Sign in to Microsoft Endpoint Manager:
Navigate to Windows Autopatch:
- Select Tenant Administration > Windows Autopatch. > Autopatch Groups
- Click Create
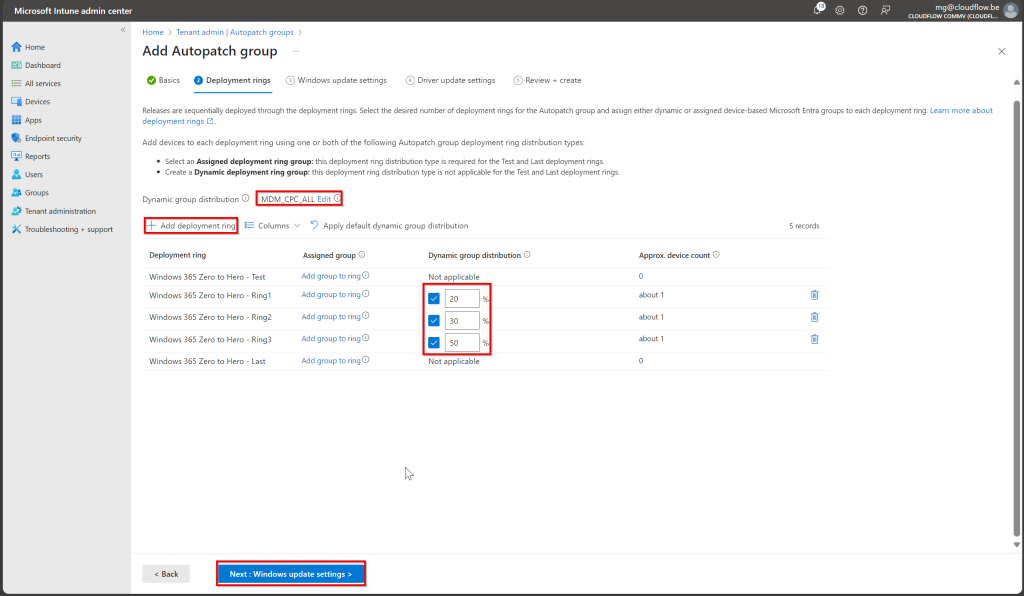
Add Custom Deployment Rings:
- Click Add Deployment Ring.
- Create custom rings
- Ring 1: 20% of devices for initial testing.
- Ring 2: 30% of devices for broader rollout.
- Ring 3: 50% for the final phase.
Assign Dynamic Groups:
Link the custom rings to your All Cloud PCs dynamic group for automated assignment.
Manage Update Settings
Because of the demo i just left these default but adjust to your needs.
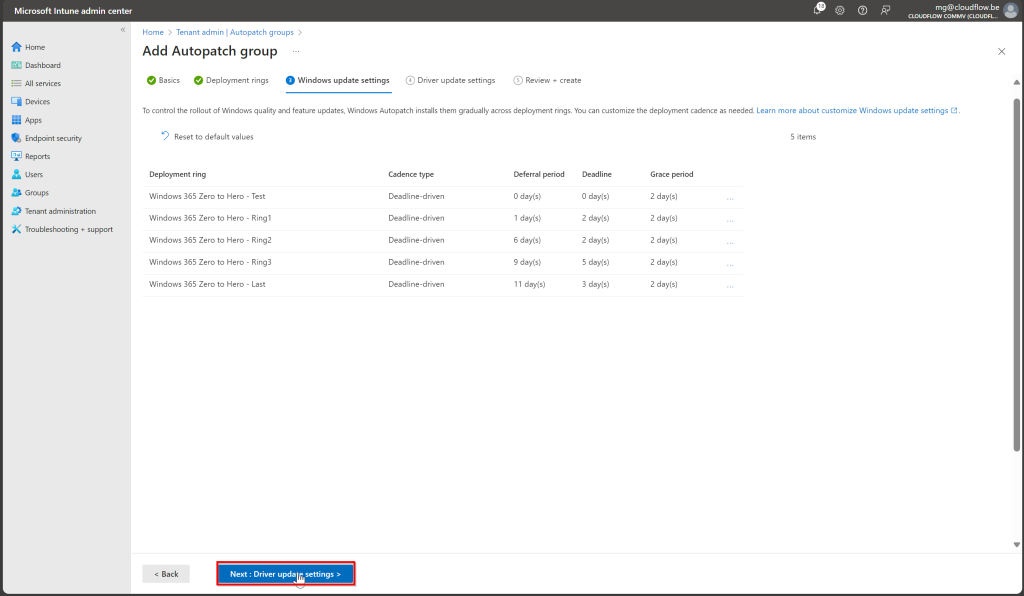
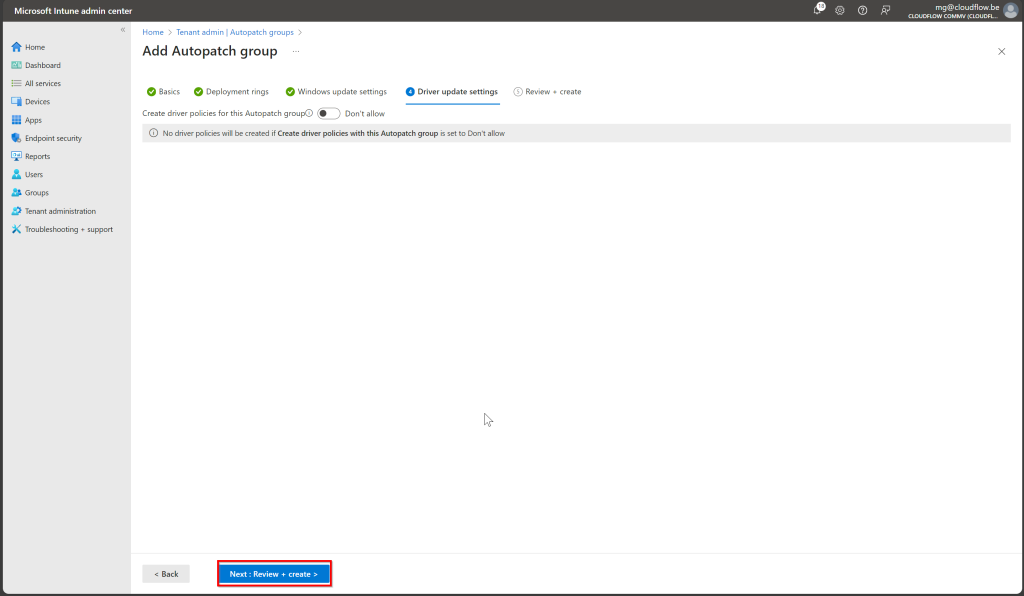
Click Review and Create
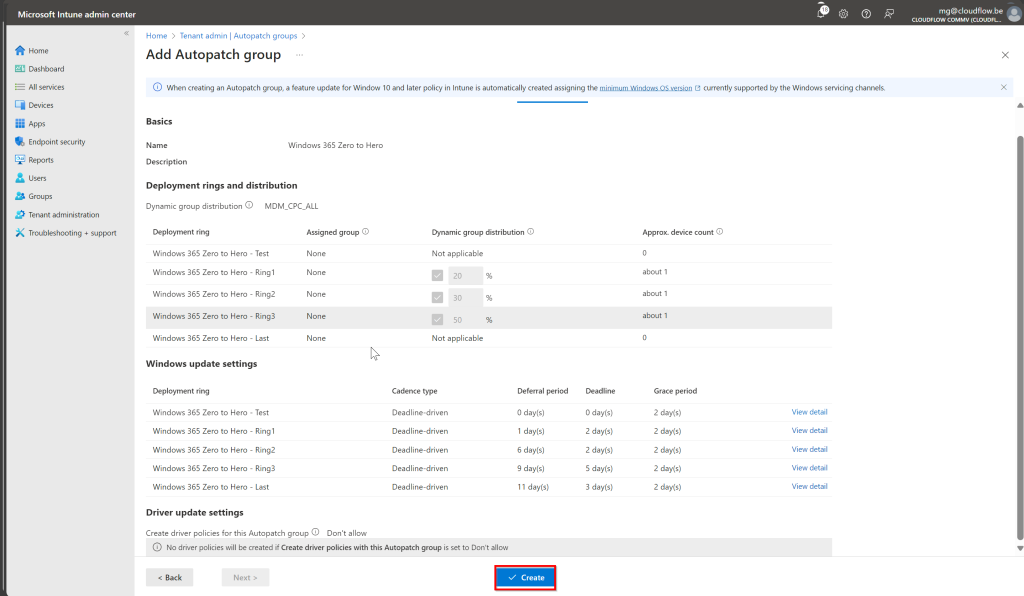
Click Create
Windows Autopatch: Security Groups and Update Profiles
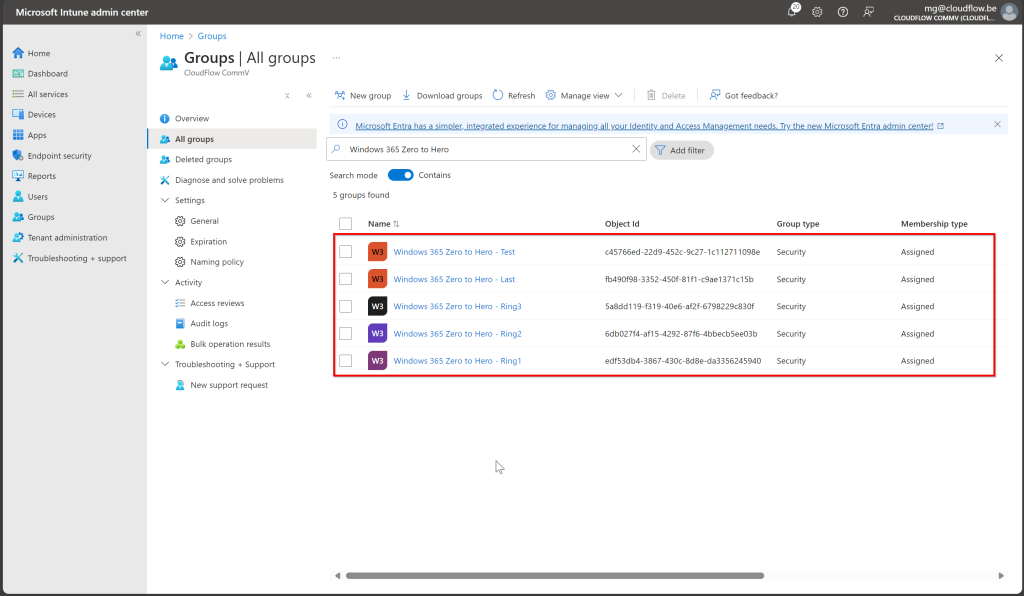
Once Windows Autopatch is deployed, it automatically creates several Security Groups and Windows Update Profiles to manage updates across your Cloud PCs. Specifically, you’ll see five Security Groups:
- Two default rings (Test and Last Rings) that are empty by default. These will need to be manually populated if you choose to use them.
- Three dynamic update rings (Ring 1, Ring 2, and Ring 3) that are automatically filled by Windows Autopatch, based on the dynamic criteria we configured earlier.
Each of these security groups is linked to its own Windows Update Ring, which governs how updates are deployed to the Cloud PCs. The dynamic rings handle the phased update process automatically, starting with Ring 1 (20%) for testing and gradually moving to broader deployment with Ring 3 (50%).
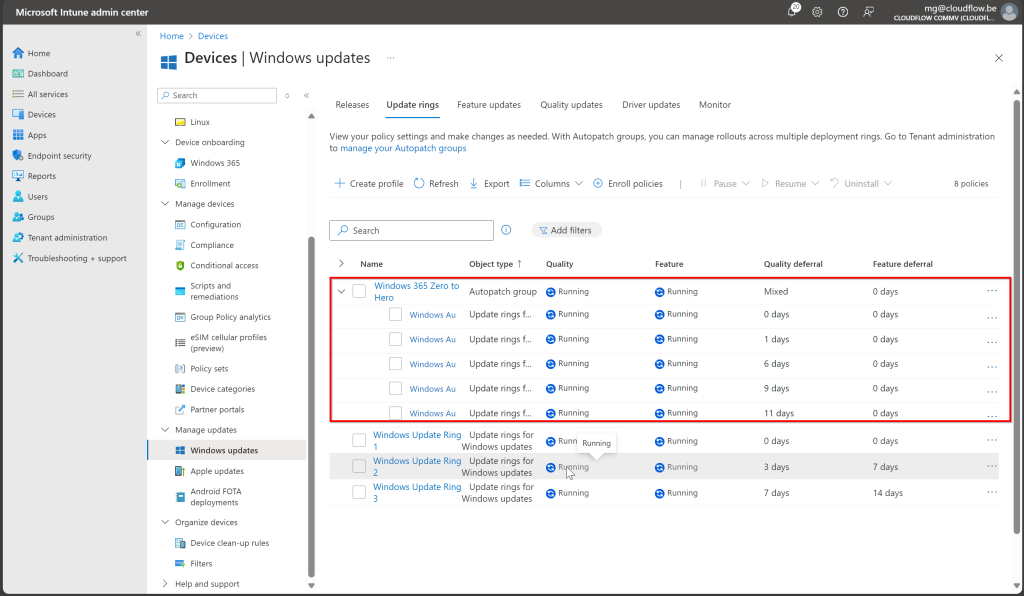
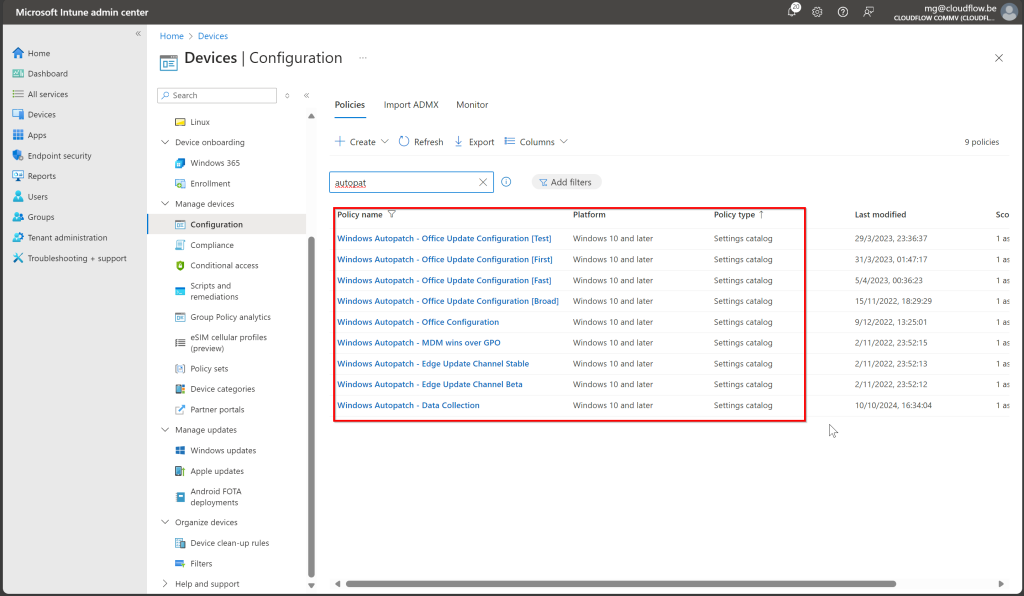
When Windows Autopatch is deployed, it does more than just create Security Groups and Windows Update Rings. In addition to these, Autopatch also generates several configuration policies that manage updates for Microsoft 365 apps and Microsoft Edge, ensuring that all your key productivity and browsing tools stay up to date automatically.
- Microsoft 365 Apps: A policy is created to ensure your Microsoft 365 apps, like Word and Excel, receive updates without manual intervention.
- Microsoft Edge: A similar policy keeps Edge updated, maintaining browser security and performance.
- Data Collection Policy: This is used to collect device health and update information, which feeds into Autopatch reports, giving you insights into your deployment.
Windows 365 Maintenance Windows
Cloud PC maintenance windows offer a way to schedule bulk resize actions, allowing admins to plan these operations during off-peak hours to minimize disruptions. While this feature is great for resizing Cloud PCs, it’s a bit disappointing that maintenance windows don’t extend to more critical updates like Windows Autopatch, OS updates, or Intune payloads. These updates are not managed by the maintenance windows, leaving them to happen independently and potentially during work hours, which can disrupt users.
If you’d like to learn more about maintenance windows and the process of resizing Cloud PCs, be sure to check out my colleague Dieter’s blog, where he has covered this topic in detail. It’s a fantastic read and will give you more in-depth insights into how to automate resizing using maintenance windows: Windows 365 Automatic Resizing Using Maintenance Windows.
Conclusion
That wraps up Part 3 of our “Windows 365: From Zero to Hero” series! We’ve walked through creating dynamic security groups and explored the automation benefits of Windows Autopatch, from managing updates to configuring security groups and policies. While we’ve seen that maintenance windows still have their limitations—like not covering updates—there’s plenty to streamline Cloud PC management.
In our next blog post, we’ll dive into the topic of picture and screenshot protection, two important features to enhance your Cloud PC security. Stay tuned for more! And like always if you have question or have remarks let me know we are here to learn.


0 Comments