
Intro
Managing compliance policies and ensuring devices meet minimum OS version requirements can be a daunting task. When setting up these policies, the minimum OS version is tied to the major release your devices are running. This necessitates creating multiple compliance policies assigned to different devices, using filters to ensure they receive the correct policy.
The Problem: Maintaining up-to-date compliance policies is crucial for ensuring the security and functionality of your device fleet. However, manual updates can be time-consuming and prone to oversight. Initially, you might diligently update the minimum OS version on your compliance policies, but manual updates can easily slip through the cracks. What starts as a monthly task can become something done every few months—or whenever you remember. This inconsistency can lead to devices running outdated software, posing security risks and compliance issues.
Why You Need This Solution: Regularly updating your OS compliance policies is essential for:
- Security: Ensuring all devices run the latest OS versions to protect against vulnerabilities.
- Compliance: Meeting organizational and regulatory standards.
- Efficiency: Reducing the manual workload and minimizing human error.
The Solution: Fortunately, there’s a solution to automate this process. By leveraging Graph API, PowerShell, Azure, and Runbooks, alongside a fantastic GitHub repository (WindowsOSBuild), you can streamline and automate your compliance policy updates. This approach ensures your devices are always compliant with the latest OS versions, without the need for constant manual intervention.
Key Benefits:
- Automation: Removes the need for manual updates, ensuring consistency.
- Accuracy: Automatically pulls the latest OS build information, reducing the risk of errors.
- Efficiency: Saves time and resources by automating a routine task.
By implementing this automated solution, you can maintain a secure, compliant, and efficient device management system, keeping your organization’s technology up to date with minimal effort.
Pre Requisites
- Azure Subscription
- Contributor or owner rights on azure subscription or Resource group where we will be deploying our assets
- Entra ID
- Intune administrator
- Privileged Role Administrator
- Intune License
Windows update Rings
For my demo of this script, I will only be creating one update ring. However, this is not considered best practice. In a production environment, you should use multiple update rings.
Using multiple update rings is a strategic approach to managing Windows updates. It enhances the reliability and stability of your IT environment by enabling staged deployments, mitigating risks, providing flexibility and control, improving user experience, and optimizing performance. This method ensures that updates are thoroughly tested and issues are resolved early, maintaining a secure and efficient system for all users.
Log in to Microsoft Intune Admin Center
- Open your web browser and navigate to the Microsoft Intune Admin Center.
- Sign in with your administrator credentials.
Navigate to Windows Update Rings
- In the left-hand navigation pane, select “Devices”.
- Under “Devices”, select “Windows”.
- Under the “Policy” section, select “Windows Update rings”.
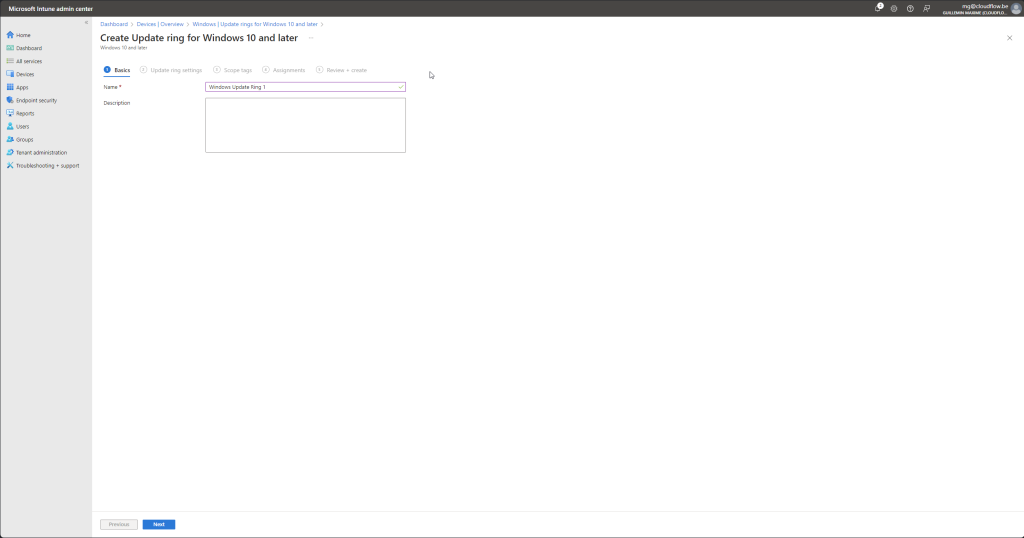
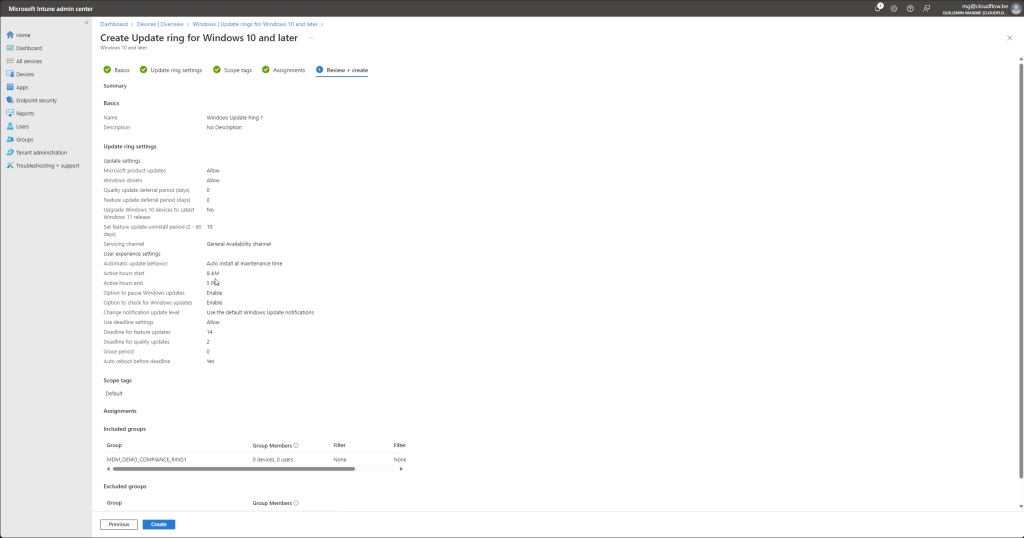
Create the Windows Update Ring
- Click on the “+ Create profile” button.
- In the “Create profile” pane, provide the following details:
- Name: Enter “Windows Update Ring 1”.
- Description: Optionally, provide a description for the update ring.
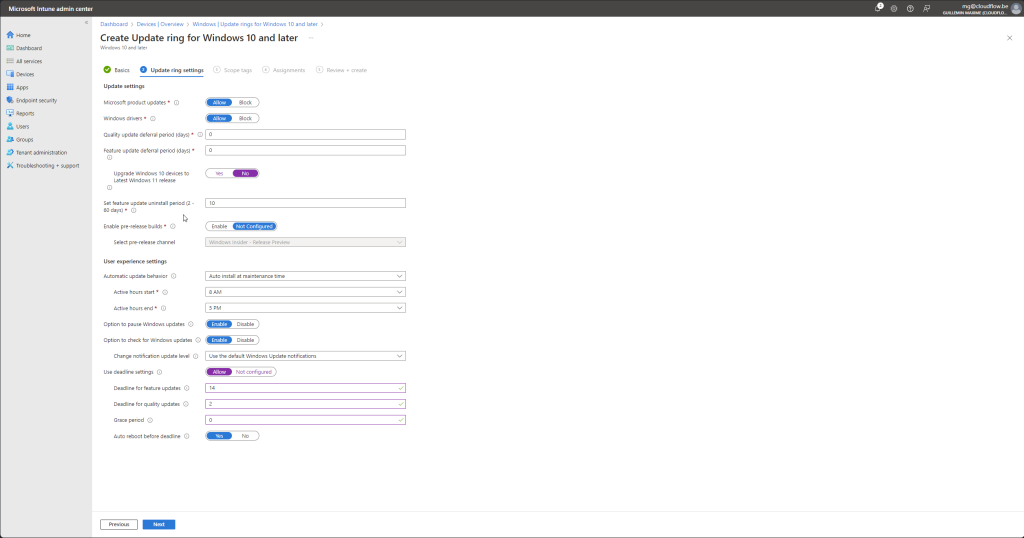
- Configure Update Settings:
- Update settings: Configure the update settings according to your organizational requirements. Common settings include deferral periods for feature and quality updates, active hours, and automatic update behavior.
- Example settings:
- Servicing channel: Select “Semi-Annual Channel”.
- Feature updates deferral period: Set to 0 days.
- Quality updates deferral period: Set to 0 days.
- Automatic update behavior: Select “Auto install and restart at maintenance time”.
- Use Deadline Settings: Select allow
- Deadline for feature updates: Set to 14 days
- Deadline for quality updates: Set to 2 days
- Grace period: Set to 0 days
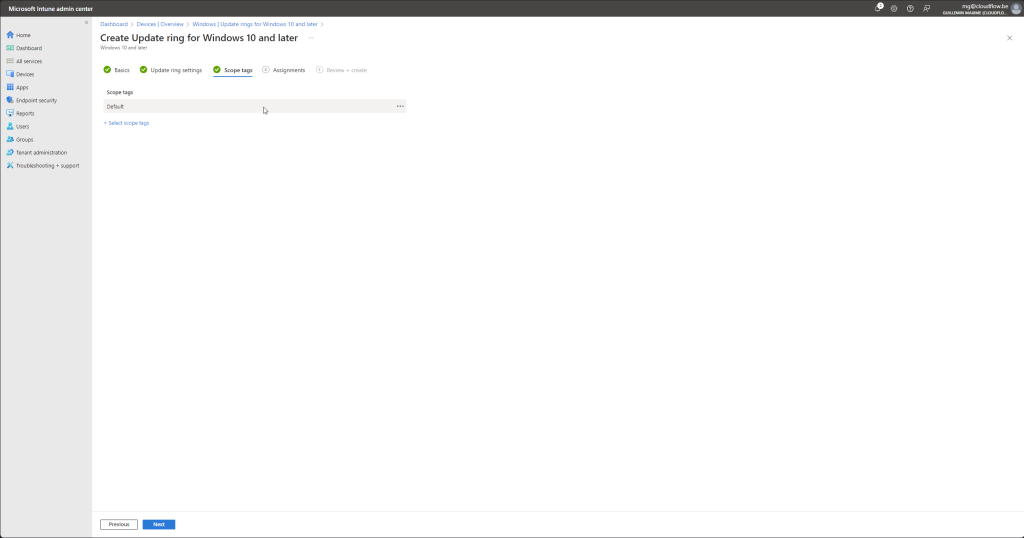
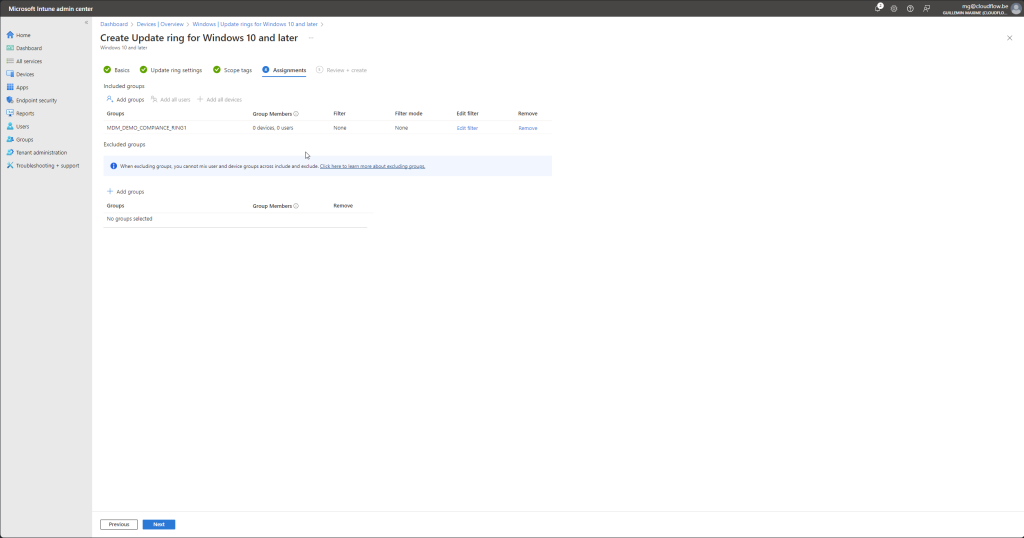
- Assign the Update Ring:
- Click on “Assignments” to assign this update ring to the appropriate groups.
- Select the user or device groups that should receive updates according to this ring.
- Review and Create:
- Click on “Review + save”.
- Review the settings and click “Save”.
Azure Resource Group
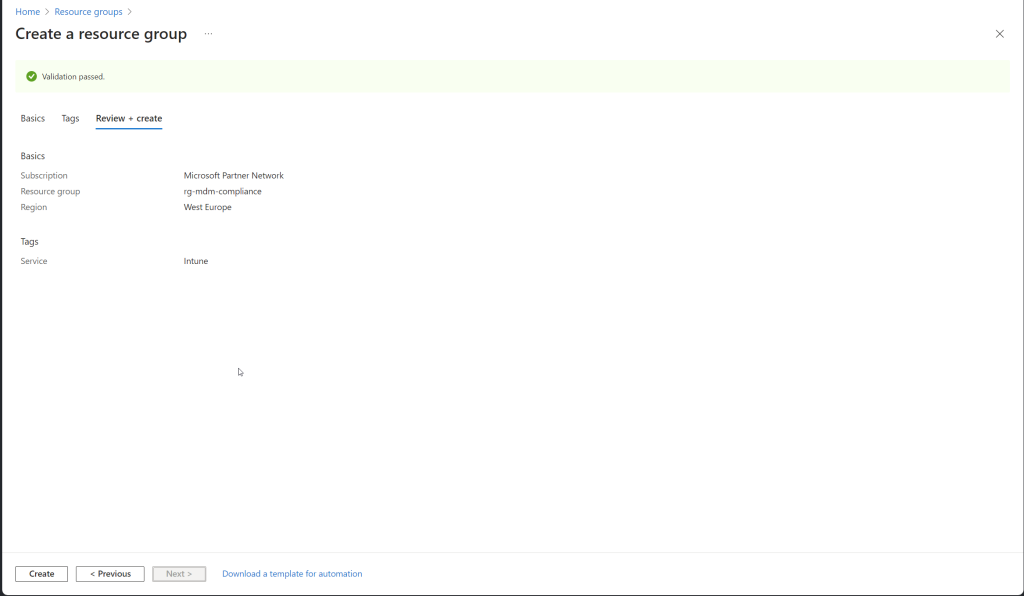
Creating an Azure Resource Group using the Azure Portal is simple and quick. Follow these steps:
- Log in to Azure Portal:
- Open your web browser and go to the Azure Portal.
- Sign in with your Azure account credentials.
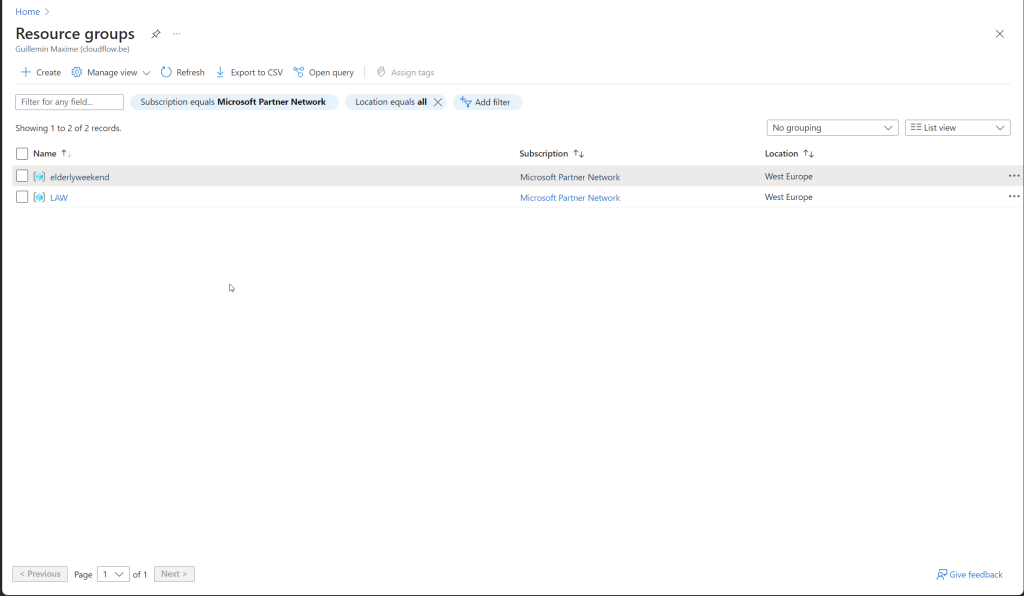
- Navigate to Resource Groups:
- In the left-hand menu, select “Resource groups”.
- Click on the “+ Create” button at the top of the Resource Groups page.
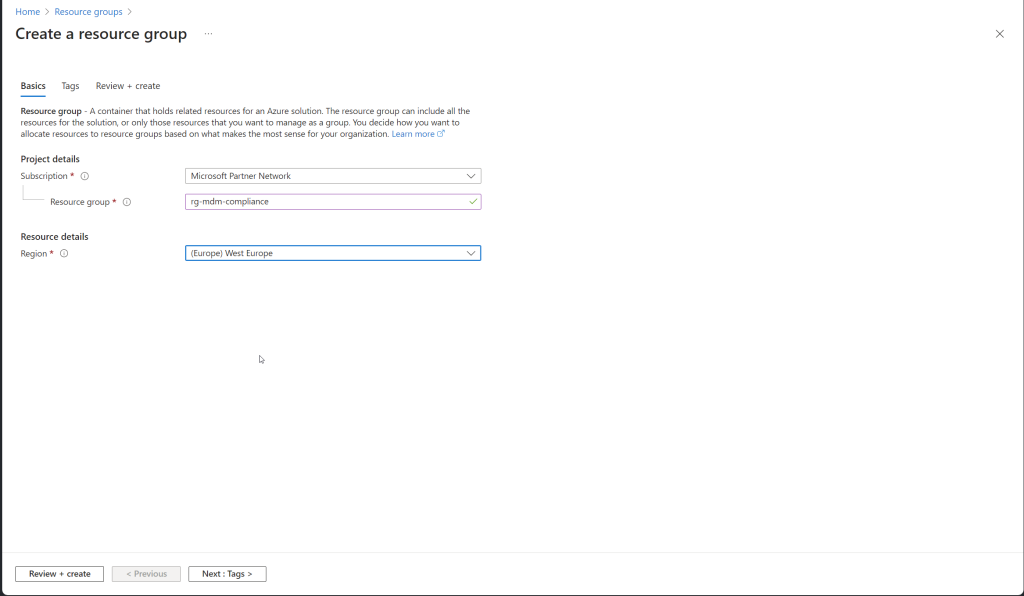
- Configure the Resource Group:
- Subscription: Choose the subscription where you want to create the Resource Group.
- Resource Group Name: Enter a unique name for the Resource Group.
- Region: Select the region where the Resource Group will be located. Choose a region closest to your users or resources.
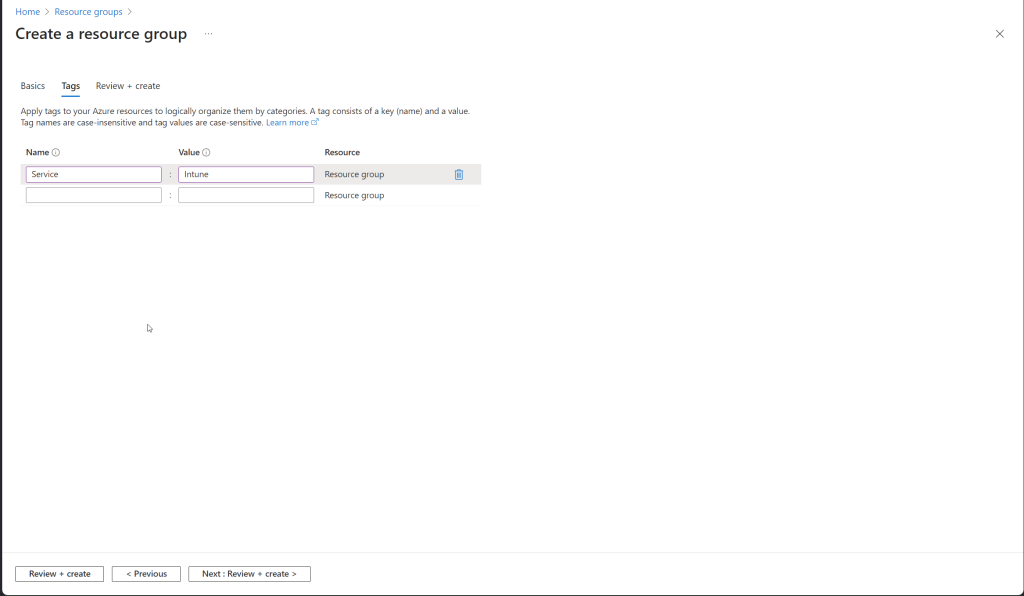
- Review and Create:
- Click “Review + Create”.
- Review the details and click “Create” to finalize the creation.
Your new Azure Resource Group is now ready for you to add resources and manage them effectively.
EntraID Managed Identity
Create Identity
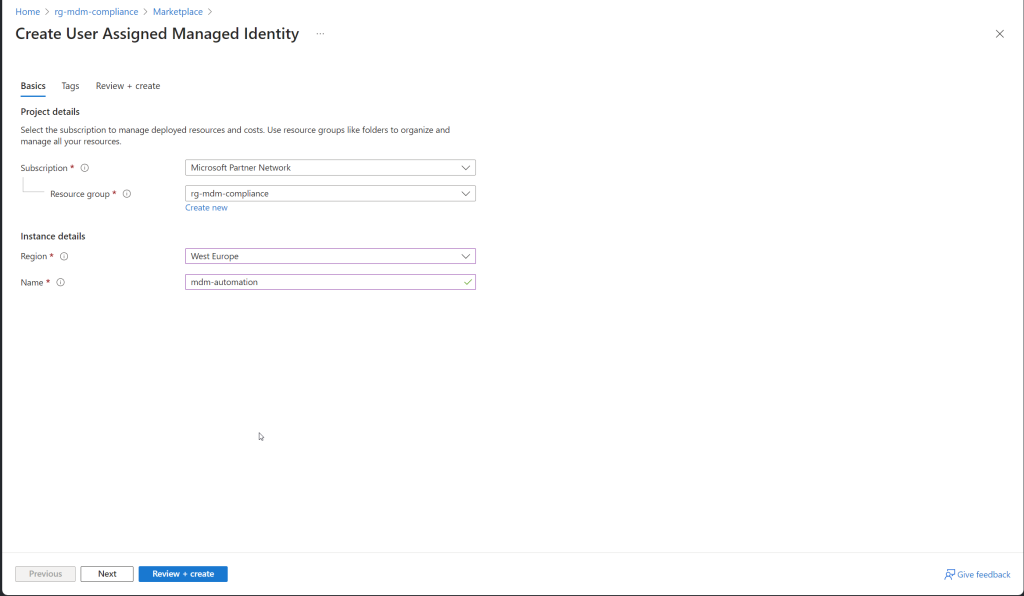
A User-Assigned Managed Identity (UAMI) in Azure provides a secure and convenient way to authenticate your applications and services without the need to manage credentials manually. When using a User-Assigned Managed Identity to authenticate with Microsoft Graph API, you can securely access Azure resources and services. Here’s a step-by-step guide on how to set this up:
- Navigate to Resource Groups:
- In the left-hand menu, select “Resource groups”.
- Click on the Resource Group you created in the previous steps.
- Add a Managed Identity:
- In the Resource Group’s menu, select “Add” to create a new resource.
- In the “Search the Marketplace” box, type “Managed Identity” and select “User Assigned Managed Identity” from the list.
- Click “Create”.
- Configure the Managed Identity:
- Subscription: Ensure the correct subscription is selected.
- Resource Group: Ensure the correct Resource Group is selected.
- Name: Enter a unique name for the Managed Identity.
- Region: Select the same region as the Resource Group.
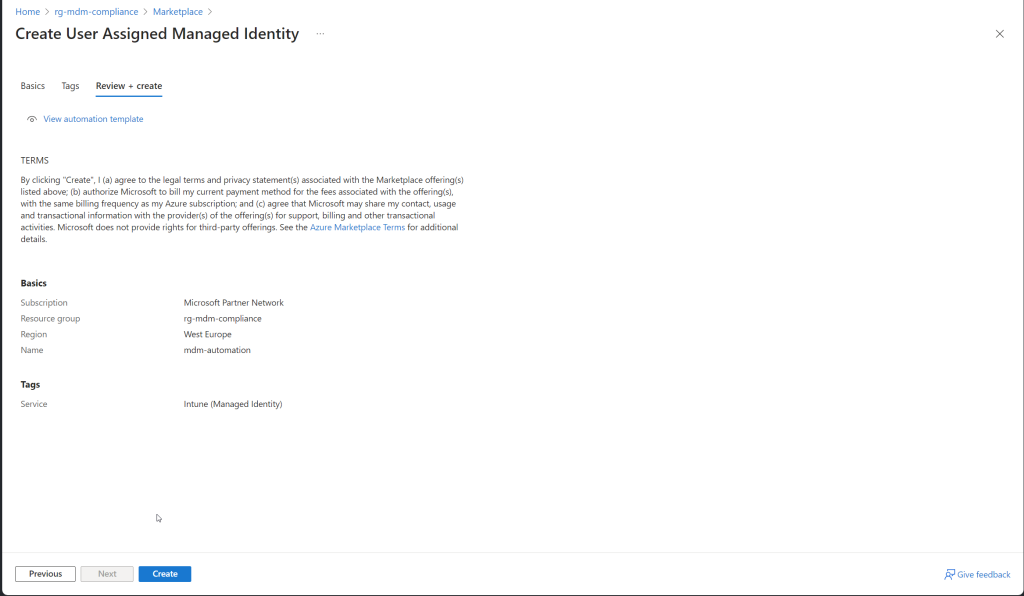
- Review and Create:
- Click “Review + Create”.
- Review the details and click “Create” to finalize the creation.

Assign Graph API Permissions [UPDATED]
Managed Identity Permissions Script
[Update Notice: Andrew Taylor kindly let me know that the AzureAD Module is being retired. Important: Azure AD Graph Retirement and Powershell Module Deprecation
Script has been Updated to use Ms-Graph Module to Assign permission]
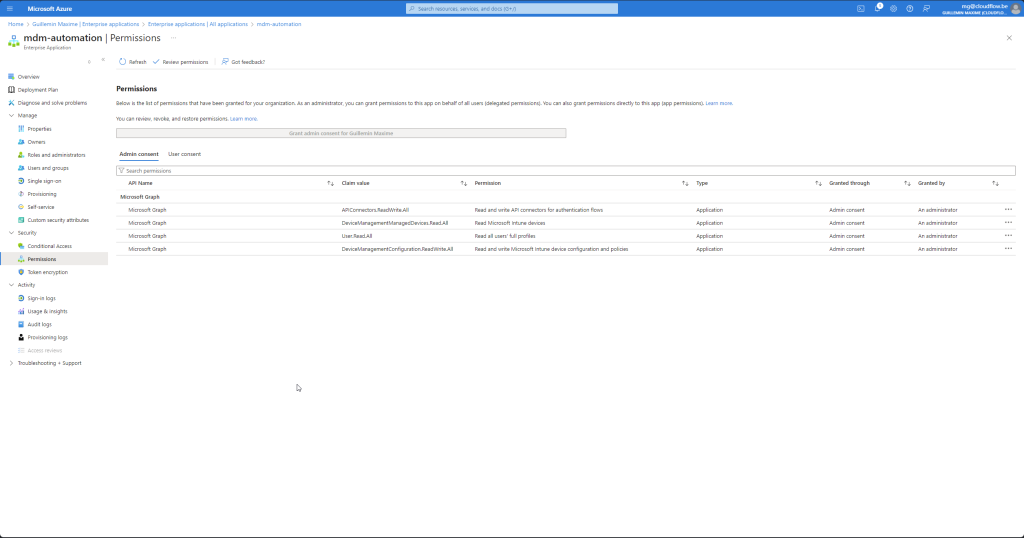
The script provided below sets up the necessary permissions for a managed identity to interact with Microsoft Graph, which is essential for managing Intune configurations
You might wonder why we are using a script instead of the UI to assign Graph permissions. The reason is simple: currently, the UI does not support assigning Graph permissions to a managed identity. This limitation necessitates the use of a script to automate the process and ensure the managed identity has the required permissions to perform its tasks.
Script Breakdown
Module Installation and Importation:
his part ensures that the AzureAD module is installed and imported. This module is crucial for interacting with Azure Active Directory (AAD) using PowerShell.
# Install the Microsoft Graph PowerShell module if not already installed.
# Install-Module Microsoft.Graph -force -Scope CurrentUser
Import-Module Microsoft.Graph
Setting Up Principal ID
You need to provide your Azure AD tenant ID and the managed identity’s principal ID. These values can be found in the Azure portal under the Azure Active Directory section.
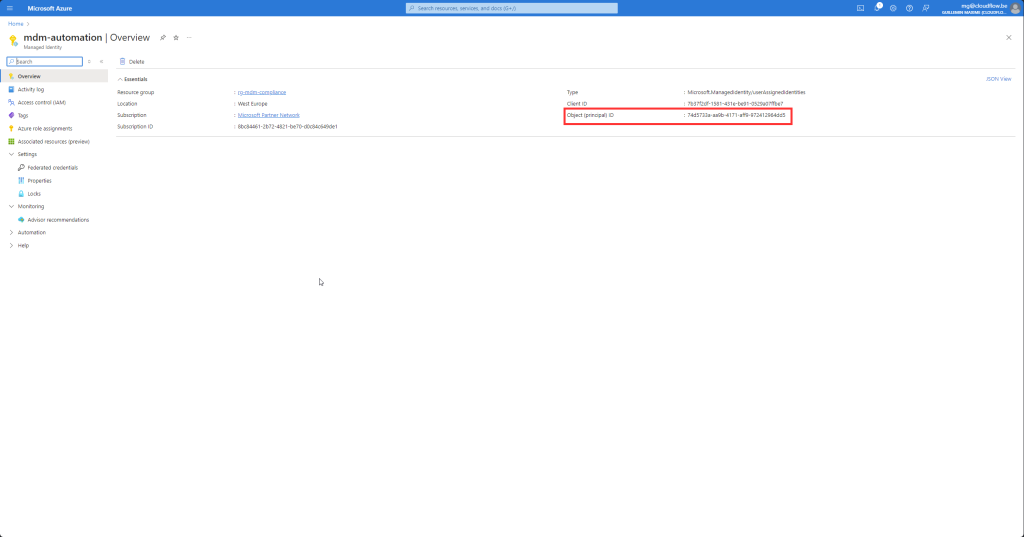
# Define your pricipalId
$principalId = "74d5733a-aa9b-4171-aff9-972412964dd5"
Defining Necessary Permissions:
Here, we define an array of permissions that the managed identity will need. These permissions are specific to operations related to Intune and Microsoft Graph.
# Check the Microsoft Graph documentation for the permission you need for the operation.
$permissions = @(
        "APIConnectors.ReadWrite.All",
        "DeviceManagementConfiguration.ReadWrite.All",
        "DeviceManagementManagedDevices.Read.All",
        "User.Read.All"
  )
Connect MgGraph
# Connect to Microsoft Graph.
Connect-MgGraph -Scopes "Application.ReadWrite.All", "Directory.ReadWrite.All", "RoleManagement.ReadWrite.Directory, AppRoleAssignment.ReadWrite.All"
Retrieving the Microsoft Graph Service Principal
This command retrieves the service principal for Microsoft Graph. The AppId 00000003-0000-0000-c000-000000000000 is a unique identifier for Microsoft Graph in Azure AD.
# Get the service principal for Microsoft Graph.
$GraphServicePrincipal = Get-MgServicePrincipal -Filter "appId eq '00000003-0000-0000-c000-000000000000'"
Assigning Permissions to the Managed Identity
This loop iterates over each permission defined earlier, finds the corresponding app role in the Microsoft Graph service principal, and assigns it to the managed identity. This step ensures that the managed identity has the necessary permissions to perform operations on Microsoft Graph, which in turn allows for automated management of Intune policies.
# Assign permissions to the managed identity service principal.
foreach ($p in $permissions) {
    $AppRole = $GraphServicePrincipal.AppRoles | Where-Object { $_.Value -eq $p -and $_.AllowedMemberTypes -contains "Application" }

    if ($AppRole) {
        New-MgServicePrincipalAppRoleAssignment -ServicePrincipalId $principalId -PrincipalId $principalId -ResourceId $GraphServicePrincipal.Id -AppRoleId $AppRole.Id
    } else {
        Write-Host "Permission $p not found."
    }
}

# Disconnect from Microsoft Graph.
Disconnect-MgGraph
Check permissions
Sign In to the Azure Portal
- Open your web browser and navigate to the Azure Portal.
- Sign in with your Azure account credentials.
Navigate to EntraID
- In the Azure Portal, use the search bar at the top to search for “EntraID”.
- Click on “Azure Active Directory” from the search results.
App Registrations
- In the Azure Active Directory pane, select “App registrations” from the left-hand menu.
- Find the application (or managed identity) for which you want to check or manage Graph API permissions. If the managed identity isn’t listed, ensure you have created an app registration for it.
API Permissions
- Click on the application to open its settings.
- In the application settings pane, select “API permissions” from the left-hand menu.
- Here, you will see a list of all the API permissions granted to the application, including Microsoft Graph API permissions.
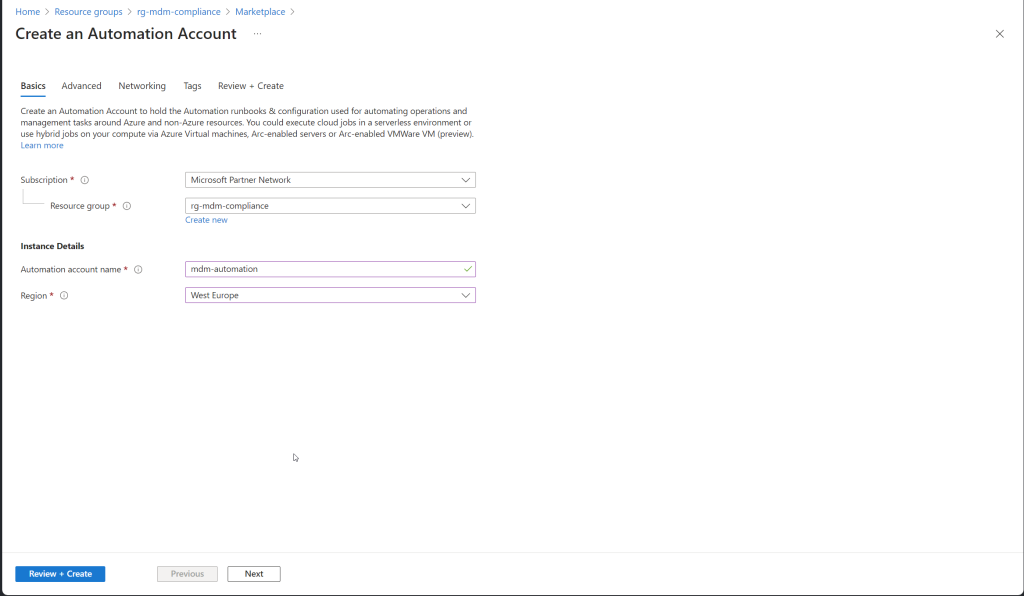
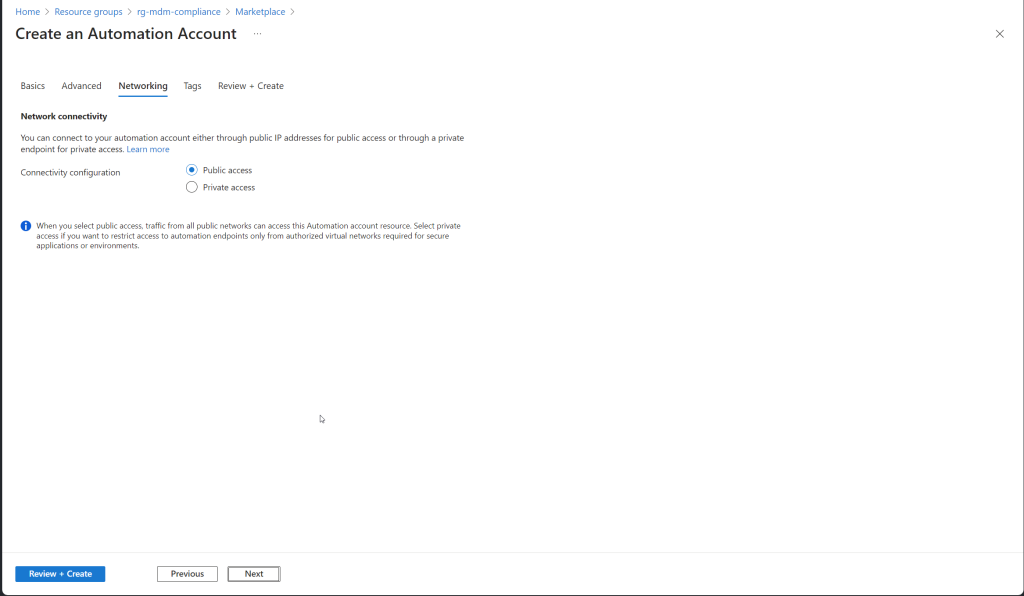
Azure Automation Account
Creating an Azure Automation Account using the Azure Portal is simple. Follow these steps:
- Navigate to Create a Resource:
- In the left-hand menu, click on “Create a resource”.
- In the “Search the Marketplace” box, type “Automation” and select “Automation” from the list.
- Click “Create” to start the creation process.
- Configure the Automation Account:
- Subscription: Select the appropriate subscription where you want to create the Automation Account.
- Resource Group: Select the Resource Group you created earlier.
- Name: Enter a unique name for the Automation Account.
- Region: Select the same region as your Resource Group.
- Create Azure Run As Account: Choose whether to create a Run As account, which is used to authenticate with Azure services. For most scenarios, you should select “Yes”.
- Review and Create:
- Click “Review + Create”.
- Review the details and click “Create” to finalize the creation.


Connect Managed Identity to automation Account
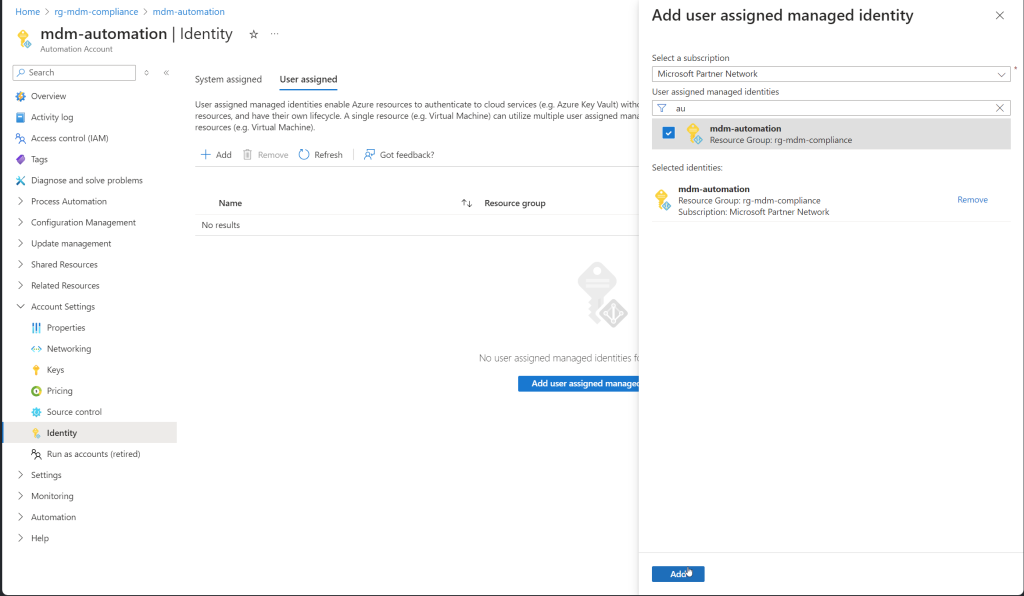
Follow these steps to connect the Managed Identity you created to your Azure Automation Account:
- Navigate to the Automation Account:
- In the left-hand menu, select “Resource groups” and then click on the Resource Group where your Automation Account is located.
- Click on the Automation Account you created earlier.
- Enable System-Assigned Managed Identity:
- In the Automation Account’s menu, select “Identity” under the “Account Settings” section.
- On the “User assigned” tab, Click “+ Add”.
- Select the managed identity you created and click “add”


Verifying the Managed Identity Connection
- Verify the Identity:
- Go back to the Automation Account’s “Identity” section.
- Under “Azure role assignments”, you should see the role assignment you just added with the Managed Identity listed.
- Testing the Connection:
- Use a runbook or a script within the Automation Account that requires access to resources permitted by the Managed Identity.
- Ensure the runbook or script can successfully authenticate and perform operations using the Managed Identity.
By following these steps, you have connected the Managed Identity to your Azure Automation Account. This allows the Automation Account to securely access resources and perform tasks as defined by the roles and permissions assigned to the Managed Identity.
WindowsOSBuild
To use the WindowsOSBuild module in your Azure Automation Runbooks, follow these steps to import and configure the module:
- Navigate to the Automation Account:
- In the left-hand menu, select “Resource groups” and then click on the Resource Group where your Automation Account is located.
- Click on the Automation Account you created earlier.
- Go to Modules Gallery:
- In the Automation Account’s menu, select “Modules” under the “Shared Resources” section.
- Click on “Browse gallery”.
- Search and Import the
WindowsOSBuildModule:- In the Modules Gallery search box, type
WindowsOSBuildand press Enter. - Select the
WindowsOSBuildmodule from the search results. - Click on the module, then click on “Import” to add it to your Automation Account.
- In the Modules Gallery search box, type
- Verify Module Import:
- After importing, navigate back to the “Modules” section.
- Ensure the
WindowsOSBuildmodule is listed among the imported modules.


Verify Module installation
Create or Edit a Runbook:
- In the Automation Account’s menu, select “Runbooks” under the “Process Automation” section.
- Click on “Create a runbook” to create a new one or select an existing runbook to edit.
- Provide the necessary details (name, type, and description) if creating a new runbook.
Edit the Runbook:
- Open the runbook in the editor.
- Add the following line at the beginning of the script to import the
WindowsOSBuildmodule:
Import-Module -Name WindowsOSBuild
Use the Module in Your Runbook:
- Write the PowerShell code in your runbook that utilizes the
WindowsOSBuildmodule’s
# Import the WindowsOSBuild module
Import-Module -Name WindowsOSBuild

# Example usage of a cmdlet from the WindowsOSBuild module
$osBuildInfo = Get-LatestOSBuild -OSName 'Win10' -OSversion '21H1'
Write-Output $osBuildInfo
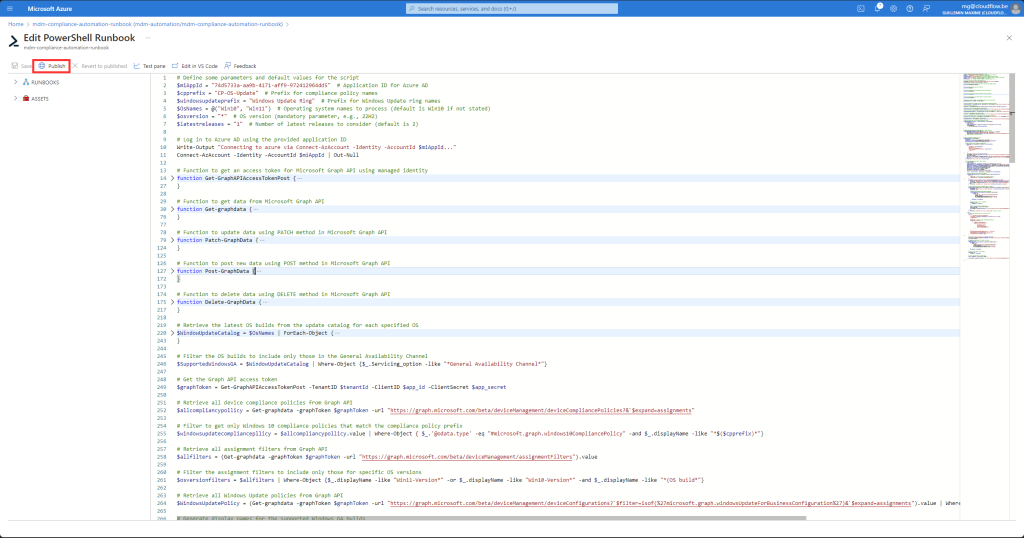
Publish and Test the Runbook:
- After writing your script, click “Save” and then “Publish” to make the runbook available for execution.
- Click on “Start” to test the runbook and ensure it runs successfully using the
WindowsOSBuildmodule.
By following these steps, you have successfully added the WindowsOSBuild module to your Azure Automation Account and configured a runbook to use it. This allows you to leverage the module’s capabilities to manage and retrieve Windows OS build information within your automation workflows.
PowerShell Runbook


Automation Script Breakdown
You can find the full script on my GitHub
Define Variables
This section sets up initial parameters, such as the Application ID for Azure AD, prefixes for compliance policy names, OS names to process, and the number of latest releases to consider.
# Define some parameters and default values for the script
$miAppId = ""  # Application ID for Azure AD
$cpprefix = "CP-OS-Update"  # Prefix for compliance policy names
$windowsupdateringname = "Windows Update Ring 1"  # Windows Update Ring Name
$OsNames = @("Win10", "Win11")  # Operating system names to process (default is Win10 if not stated)
$osversion = "*"  # OS version (mandatory parameter, e.g., 22H2)
$latestreleases = "1"  # Number of latest releases to consider (default is 2)
Log in to Azure AD
This command logs into Azure AD using the provided application ID.
# Log in to Azure AD using the provided application ID
Write-Output "Connecting to azure via Connect-AzAccount -Identity -AccountId $miAppId..."
Connect-AzAccount -Identity -AccountId $miAppId | Out-Null
Function to Get Access Token for Microsoft Graph API
This function retrieves an access token for the Microsoft Graph API using the managed identity.
function Get-GraphAPIAccessTokenPost {
    $url = $env:IDENTITY_ENDPOINT
    $headers = @{
        'Metadata'= 'True'
        'X-IDENTITY-HEADER' = $env:IDENTITY_HEADER
    }
    $body = @{
        'resource'='https://graph.microsoft.com'
        'client_id'= $miAppId
    }
    # Send POST request to get access token
    $accessToken = Invoke-RestMethod $url -Method 'POST' -Headers $headers -ContentType 'application/x-www-form-urlencoded' -Body $body
    Write-Output $accessToken.access_token
}
Function to Get Data from Microsoft Graph API
This function retrieves data from the Microsoft Graph API, with support for pagination and retries.
# Function to get data from Microsoft Graph API
function Get-graphdata {
    param(
        [Parameter(Mandatory=$true)]
        [string] $graphToken,
        [string] $url
    )
    $authHeader = @{
        'Authorization' = "$graphToken"
        'Content-Type'  = 'application/json'
    }
    $retryCount = 0
    $maxRetries = 3
    $Results = @()

    # Loop to handle retries
    while ($retryCount -le $maxRetries) {
        try {
            do {
                # Send GET request to Microsoft Graph API
                $response = Invoke-WebRequest -Uri $url -Method Get -Headers $authHeader -UseBasicParsing
                $pageResults = $response.Content | ConvertFrom-Json
                $retryCount = 0
                if ($pageResults.'@odata.nextLink' -ne $null) {
                    $url = $pageResults.'@odata.nextLink'
                    $results += $pageResults
                } else {
                    $results += $pageResults
                    return $results
                }
            } while ($pageResults.'@odata.nextLink')
        } catch {
            $statusCode = $_.Exception.Response.StatusCode

            if ($statusCode -in $retryStatusCodes) {
                $retryCount++
                $retryAfter = [int]($_.Exception.Response.Headers.'Retry-After')
                $sleepcount = if ($retryAfter) { $retryAfter } else { $retryCount * $global:apiTtimeout }
                Start-Sleep -Seconds $sleepcount
            } elseif ($statusCode -in $statusCodesObject.code) {
                return $null
            } else {
                Write-Error "$($_.Exception)"
                return $null
            }
        }
    }
}
Functions for PATCH, POST, and DELETE Methods in Microsoft Graph API
These functions handle updating, creating, and deleting data in the Microsoft Graph API, with retry logic for robust error handling.
# Function to update data using PATCH method in Microsoft Graph API
function Patch-GraphData {
    param(
        [Parameter(Mandatory=$true)]
        [string] $graphToken,

        [Parameter(Mandatory=$true)]
        [string] $url,

        [Parameter(Mandatory=$true)]
        [string] $body
    )
    $authHeader = @{
        'Authorization' = "$graphToken"
        'Content-Type'  = 'application/json'
    }
    $retryCount = 0
    $maxRetries = 3

    # Loop to handle retries
    while ($retryCount -le $maxRetries) {
        try {
            # Send PATCH request to Microsoft Graph API
            $response = Invoke-RestMethod -Uri $url -Method Patch -Headers $authHeader -Body $body -ContentType "application/json"
            return $response
        } catch {
            $statusCode = $_.Exception.Response.StatusCode
            if ($statusCode -eq 429) { # Too many requests
                $retryCount++
                $retryAfter = [int]($_.Exception.Response.Headers.'Retry-After')
                $sleepcount = if ($retryAfter) { $retryAfter } else { $retryCount * 10 } # Default backoff if Retry-After not available
                Write-Warning "API call returned error $statusCode. Too many requests. Retrying in $($sleepcount) seconds."
                Start-Sleep -Seconds $sleepcount
            } elseif ($statusCode -eq 503) { # Service unavailable
                $retryCount++
                $sleepcount = $retryCount * 10
                Write-Warning "API call returned error $statusCode. Service unavailable. Retrying in $($sleepcount) seconds."
                Start-Sleep -Seconds $sleepcount
            } else {
                Write-Error "API call returned error $statusCode."
                return $null
            }
        }
    }
    Write-Warning "Max retry attempts reached."
    return $null
}

# Function to post new data using POST method in Microsoft Graph API
function Post-GraphData {
    param(
        [Parameter(Mandatory=$true)]
        [string] $graphToken,

        [Parameter(Mandatory=$true)]
        [string] $url,

        [Parameter(Mandatory=$true)]
        [string] $body
    )
    $authHeader = @{
        'Authorization' = "$graphToken"
        'Content-Type'  = 'application/json'
    }
    $retryCount = 0
    $maxRetries = 3

    # Loop to handle retries
    while ($retryCount -le $maxRetries) {
        try {
            # Send POST request to Microsoft Graph API
            $response = Invoke-RestMethod -Uri $url -Method POST -Headers $authHeader -Body $body -ContentType "application/json"
            return $response
        } catch {
            $statusCode = $_.Exception.Response.StatusCode
            if ($statusCode -eq 429) { # Too many requests
                $retryCount++
                $retryAfter = [int]($_.Exception.Response.Headers.'Retry-After')
                $sleepcount = if ($retryAfter) { $retryAfter } else { $retryCount * 10 } # Default backoff if Retry-After not available
                Write-Warning "API call returned error $statusCode. Too many requests. Retrying in $($sleepcount) seconds."
                Start-Sleep -Seconds $sleepcount
            } elseif ($statusCode -eq 503) { # Service unavailable
                $retryCount++
                $sleepcount = $retryCount * 10
                Write-Warning "API call returned error $statusCode. Service unavailable. Retrying in $($sleepcount) seconds."
                Start-Sleep -Seconds $sleepcount
            } else {
                Write-Error "API call returned error $statusCode."
                return $null
            }
        }
    }
    Write-Warning "Max retry attempts reached."
    return $null
}

# Function to delete data using DELETE method in Microsoft Graph API
function Delete-GraphData {
    param(
        [Parameter(Mandatory=$true)]
        [string] $graphToken,

        [Parameter(Mandatory=$true)]
        [string] $url
    )
    $authHeader = @{
        'Authorization' = "$graphToken"
        'Content-Type'  = 'application/json'
    }
    $retryCount = 0
    $maxRetries = 3

    # Loop to handle retries
    while ($retryCount -le $maxRetries) {
        try {
            # Send DELETE request to Microsoft Graph API
            $response = Invoke-RestMethod -Uri $url -Method DELETE -Headers $authHeader -Body $body -ContentType "application/json"
            return $response
        } catch {
            $statusCode = $_.Exception.Response.StatusCode
            if ($statusCode -eq 429) { # Too many requests
                $retryCount++
                $retryAfter = [int]($_.Exception.Response.Headers.'Retry-After')
                $sleepcount = if ($retryAfter) { $retryAfter } else { $retryCount * 10 } # Default backoff if Retry-After not available
                Write-Warning "API call returned error $statusCode. Too many requests. Retrying in $($sleepcount) seconds."
                Start-Sleep -Seconds $sleepcount
            } elseif ($statusCode -eq 503) { # Service unavailable
                $retryCount++
                $sleepcount = $retryCount * 10
                Write-Warning "API call returned error $statusCode. Service unavailable. Retrying in $($sleepcount) seconds."
                Start-Sleep -Seconds $sleepcount
            } else {
                Write-Error "API call returned error $statusCode."
                return $null
            }
        }
    }
    Write-Warning "Max retry attempts reached."
    return $null
}
Retrieve and Process Latest OS Builds
This section retrieves the latest OS builds from the update catalog for each specified OS and filters them to include only those in the General Availability Channel.
# Retrieve the latest OS builds from the update catalog for each specified OS
$WindowUpdateCatalog = $OsNames | ForEach-Object {
    $os = $_
    $osbuilds = Get-LatestOSBuild -OSName $os -OSversion $osversion -LatestReleases $latestreleases -ExcludePreview
    $osbuilds | ForEach-Object {
        $osVersions = $_.Version.Substring(8, 4)
        $osVersions | ForEach-Object {
            $osbuild = Get-LatestOSBuild -OSName $os -OSversion $_ -LatestReleases 1 -ExcludePreview
            $osbuild | ForEach-Object {
                [PSCustomObject]@{
                    os = $os
                    Version = $_.Version
                    qualityUpdateVersion = "10.0."+$_.Build
                    Availability_date = $_.'Availability date'
                    Preview = $_.'Preview'
                    'Out-of-band' = $_.'Out-of-band'
                    Servicing_option = $_.'Servicing option'
                    KB_article = $_.'KB article'
                    KB_URL = $_.'KB URL'
                    Catalog_URL = $_.'Catalog URL'
                }
            }
        }
    }
}

# Filter the OS builds to include only those in the General Availability Channel
$SupportedWindowsGA = $WindowUpdateCatalog | Where-Object {$_.Servicing_option -like "*General Availability Channel*"}
Retrieve Graph API Access Token & Filter Compliance Policies and Assignment Filters
This section retrieves an access token for the Microsoft Graph API and etrieves all device compliance policies and assignment filters from the Microsoft Graph API, and filters them based on specific criteria.
# Get the Graph API access token
$graphToken = Get-GraphAPIAccessTokenPost -TenantID $tenantId -ClientID $app_id -ClientSecret $app_secret

# Retrieve all device compliance policies from Graph API
$allcompliancypollicy = Get-graphdata -graphToken $graphToken -url "https://graph.microsoft.com/beta/deviceManagement/deviceCompliancePolicies?&`$expand=assignments"

# Filter to get only Windows 10 compliance policies that match the compliance policy prefix
$windowsupdatecompliancepllicy = $allcompliancypollicy.value | Where-Object { $_.'@odata.type' -eq "#microsoft.graph.windows10CompliancePolicy" -and $_.displayName -like "*$($cpprefix)*"}

# Retrieve all assignment filters from Graph API
$allfilters = (Get-graphdata -graphToken $graphToken -url "https://graph.microsoft.com/beta/deviceManagement/assignmentFilters").value

# Filter the assignment filters to include only those for specific OS versions
$osversionfilters = $allfilters | Where-Object {$_.displayName -like "Win11-Version*" -or $_.displayName -like "Win10-Version*" -and $_.displayName -like "*(OS build*"}

# Retrieve all Windows Update policies from Graph API
$WindowsUpdatePolicy = (Get-graphdata -graphToken $graphToken -url "https://graph.microsoft.com/beta/deviceManagement/deviceConfigurations?`$filter=isof(%27microsoft.graph.windowsUpdateForBusinessConfiguration%27)&`$expand=assignments").value | Where-Object {$_.displayName -like "*$($windowsupdateringname)*"}
Generating Display Names for Supported Windows GA Builds
It then generates display names for the compliance policies associated with each supported Windows GA build:
# Generate display names for the supported Windows GA builds
$SupportedWindowsGADisplaynames = $SupportedWindowsGA | ForEach-Object {
    $osVersion = $_
        $compliancedisplayname = "$($cpprefix)-$($osVersion.os)-$($osVersion.version)-$($windowsupdateringname)"
        [PSCustomObject]@{
            compliancedisplayname= $compliancedisplayname
        }
}
Deleting Deprecated Compliance Policies
The script checks for and deletes any deprecated compliance policies that are no longer supported by comparing existing policies with the supported Windows GA builds:
# Delete deprecated compliance policies that are no longer supported
$windowsupdatecompliancepllicy| ForEach-Object {
    if($SupportedWindowsGADisplaynames.compliancedisplayname -notcontains $_.displayName){
        Write-Output "delete deprecated Major Os Release $($_.displayName)"
        Delete-GraphData -graphToken $graphToken -url "https://graph.microsoft.com/beta/deviceManagement/deviceCompliancePolicies/$($_.id)"
        #TODO delete major os release filter
    }
}
Creating or Updating Compliance Policies and Filters
For each supported Windows GA build, the script checks if a corresponding compliance policy exists. If not, it creates a new compliance policy and the necessary filters. If the policy exists, it updates the compliance settings and assignments as needed
One of the key features of this script is that it updates compliance policies only after a specific deadline date. This deadline date is calculated based on the configuration of each Windows Update policy. Here’s how it works:
Calculation of Deadline Date
For each Windows Update policy, the script calculates a deadline date. This deadline is derived from the sum of three different deferral periods configured within the Windows Update policy:
- Quality Updates Deferral Period (
qualityUpdatesDeferralPeriodInDays) - Deadline for Quality Updates (
deadlineForQualityUpdatesInDays) - Deadline Grace Period (
deadlineGracePeriodInDays)
The script adds these periods to the availability date of the OS build to determine the exact deadline date by which the policy must be updated.
Conditional Policy Update
The script then checks if the current date has reached or surpassed the calculated deadline date. Only if this condition is met, and if the OS version in the compliance policy does not match the latest OS build, the script proceeds to update the compliance policy.
Conditional Policy Update
The script then checks if the current date has reached or surpassed the calculated deadline date. Only if this condition is met, and if the OS version in the compliance policy does not match the latest OS build, the script proceeds to update the compliance policy.
Updating Assignments
If the policy needs to be updated, the script also checks for differences in the assignment targets (group IDs) between the existing compliance policy and the corresponding Windows Update policy. If differences are found, it updates the assignments accordingly.
# Process each supported Windows GA build
$SupportedWindowsGA | ForEach-Object {
    $osVersion = $_
    $lastDotIndex = $osVersion.qualityUpdateVersion.LastIndexOf('.')
    $majorversion = $osVersion.qualityUpdateVersion.Substring(0, $lastDotIndex)
    $filterdisplayname = "$($osVersion.os)-$($osVersion.version)"

    # Create a new filter if it does not already exist
    if ($osversionfilters.displayName -notcontains $filterdisplayname){
        $body = @"
        {
            "displayName": "$filterdisplayname",
            "description": "",
            "platform": "Windows10AndLater",
            "rule": "(device.osVersion -startsWith \"$majorversion\")",
            "roleScopeTags": [
                "0"
            ]
        }
"@
        Write-Output "Create new filter $filterdisplayname"
        Post-GraphData -graphToken $graphToken -url "https://graph.microsoft.com/beta/deviceManagement/assignmentFilters" -body $body
        Start-Sleep -Seconds 5
        $allfilters = (Get-graphdata -graphToken $graphToken -url "https://graph.microsoft.com/beta/deviceManagement/assignmentFilters").value
        $osversionfilters = $allfilters | Where-Object {$_.displayName -like "Win11-Version*" -or $_.displayName -like "Win10-Version*" -and $_.displayName -like "*(OS build*"}
    } else {
        Write-Output "filter already exists $filterdisplayname"
    }

    # Process each update ring (Ring 1, Ring 2, Ring 3)
        $compliancedisplayname = "$($cpprefix)-$($osVersion.os)-$($osVersion.version)-$($windowsupdateringname)"
        $windowsupdatering = $WindowsUpdatePolicy | Where-Object {$_.displayName -like "*$($windowsupdateringname)*"}
        $complincepolicytoupdate =  $windowsupdatecompliancepllicy | Where-Object {$_.displayName -eq $compliancedisplayname}
        $deadlineint = $windowsupdatering.qualityUpdatesDeferralPeriodInDays + $windowsupdatering.deadlineForQualityUpdatesInDays + $windowsupdatering.deadlineGracePeriodInDays
        $Availability_date = Get-Date $osVersion.Availability_date
        $deadline_date = $Availability_date.AddDays($deadlineint)
        $Current_date = Get-Date -Hour 0 -Minute 0 -Second 0
        Write-Output $windowsupdatering.displayName
        Write-Output $windowsupdatering.assignments.target.groupid

        $filter = $osversionfilters | Where-Object {$_.displayName -eq $filterdisplayname}

        # Check if compliance policy needs to be updated
        if($windowsupdatecompliancepllicy.displayName -contains $compliancedisplayname ){
            $body = @"
            {
                "@odata.type": "#microsoft.graph.windows10CompliancePolicy",
                "osMinimumVersion": "$($osVersion.qualityUpdateVersion)"
            }
"@
            Write-Output "Checcking Compliance Setting in $($complincepolicytoupdate.displayName)"
            if ($Current_date -ge $deadline_date -and $osVersion.qualityUpdateVersion -ne $complincepolicytoupdate.osMinimumVersion) {
                Write-Output "compliance pollicy to update Setting in $($complincepolicytoupdate.displayName)"
                Patch-GraphData -graphToken $graphToken -url "https://graph.microsoft.com/beta/deviceManagement/deviceCompliancePolicies/$($complincepolicytoupdate.id)" -body $body
            } else {
                Write-Output "No updated need in compliance policy $($complincepolicytoupdate.displayName)"
            }

            # Check if compliance policy assignments need to be updated
            $assignmentmatch = Compare-Object -ReferenceObject $windowsupdatering.assignments.target.groupid -DifferenceObject $complincepolicytoupdate.assignments.target.groupid
            if ($assignmentmatch) {
                Write-Output "compliance pollicy to update Assignments in $($complincepolicytoupdate.displayName)" # There are differences
                $assignments = @()

                # Populate the assignments array based on group IDs
                foreach ($groupId in $windowsupdatering.assignments.target.groupid) {
                    $assignment = @{
                        target = @{
                            '@odata.type' = "#microsoft.graph.groupAssignmentTarget"
                            groupId = $groupId
                            deviceAndAppManagementAssignmentFilterId = $filter.id
                            deviceAndAppManagementAssignmentFilterType = "include"
                        }
                    }
                    $assignments += $assignment
                }

                # Create the body object for assignments
                $bodyObject = @{
                    assignments = $assignments
                }

                # Convert the body object to a JSON string
                $Body = $bodyObject | ConvertTo-Json -Depth 10
                Write-Output $body
                Post-GraphData -graphToken $graphToken -url "https://graph.microsoft.com/beta/deviceManagement/deviceCompliancePolicies/$($complincepolicytoupdate.id)/microsoft.graph.assign" -body $body

            } else {
                Write-Output "Assignments are correct no update needed" # They are the same
            }
        } else {
            # Create a new compliance policy if it does not exist
            $body = @"
            {
                "id": "00000000-0000-0000-0000-000000000000",
                "displayName": "$($cpprefix)-$($osVersion.os)-$($osVersion.version)-$($windowsupdateringname)",
                "roleScopeTagIds": [
                    "0"
                ],
                "@odata.type": "#microsoft.graph.windows10CompliancePolicy",
                "scheduledActionsForRule": [
                    {
                        "ruleName": "PasswordRequired",
                        "scheduledActionConfigurations": [
                            {
                                "actionType": "block",
                                "gracePeriodHours": 48,
                                "notificationTemplateId": "",
                                "notificationMessageCCList": []
                            }
                        ]
                    }
                ],
                "deviceThreatProtectionRequiredSecurityLevel": "unavailable",
                "passwordRequiredType": "deviceDefault",
                "osMinimumVersion": "$($osVersion.qualityUpdateVersion)",
                "deviceThreatProtectionEnabled": false
            }
"@

            Write-Output "Create compliance policy $compliancedisplayname "
            $result = Post-GraphData -graphToken $graphToken -url "https://graph.microsoft.com/beta/deviceManagement/deviceCompliancePolicies" -body $body
            Start-Sleep -Seconds 5

            # Populate the assignments array based on group IDs
            $assignments = @()
            foreach ($groupId in $windowsupdatering.assignments.target.groupid) {
                $assignment = @{
                    target = @{
                        '@odata.type' = "#microsoft.graph.groupAssignmentTarget"
                        groupId = $groupId
                        deviceAndAppManagementAssignmentFilterId = $filter.id
                        deviceAndAppManagementAssignmentFilterType = "include"
                    }
                }
                $assignments += $assignment
            }

            # Create the body object for assignments
            $bodyObject = @{
                assignments = $assignments
            }

            # Convert the body object to a JSON string
            $Body = $bodyObject | ConvertTo-Json -Depth 10

            Post-GraphData -graphToken $graphToken -url "https://graph.microsoft.com/beta/deviceManagement/deviceCompliancePolicies/$($result.id)/microsoft.graph.assign" -body $body
        }
}
Key Takeaways
- Retrieving Windows Update Policies: The script retrieves Windows Update policies from the Microsoft Graph API and filters them based on specific criteria.
- Generating Display Names: It generates display names for compliance policies associated with the supported Windows GA builds.
- Deleting Deprecated Policies: The script identifies and deletes deprecated compliance policies that are no longer supported.
- Creating/Updating Compliance Policies: For each supported Windows GA build, the script creates new compliance policies if they do not exist, or updates existing policies. This includes updating compliance settings and assignments based on the latest Windows Update policies.
- Assignment Filters: The script also creates and manages assignment filters to ensure policies are correctly applied to devices based on their OS versions.
This approach ensures that your Intune environment is always up-to-date with the latest OS builds and compliance requirements, reducing the need for manual intervention and minimizing the risk of non-compliance.
Publish Runbook
Schedule
Scheduling a runbook in Azure Automation allows you to automate tasks at specific times or intervals. Here’s a step-by-step guide on how to add a schedule to a runbook using the Azure Portal:
- Navigate to the Automation Account:
- In the left-hand menu, select “Resource groups” and then click on the Resource Group where your Automation Account is located.
- Click on the Automation Account you created earlier.
- Go to Runbooks:
- In the Automation Account’s menu, select “Runbooks” under the “Process Automation” section.
- Select the runbook to which you want to add a schedule.
- Add a Schedule:
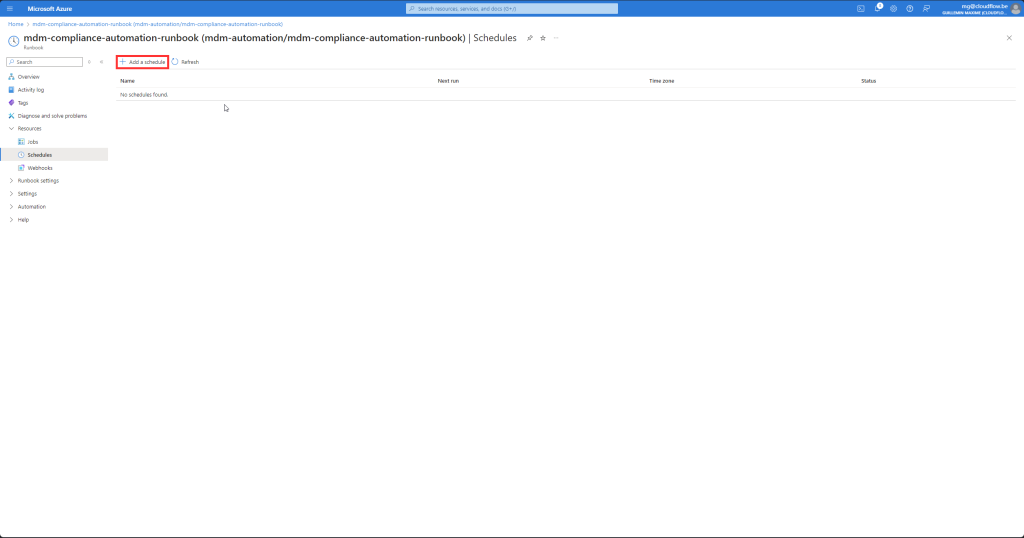
- In the runbook details page, click on “Schedules” in the left-hand menu.
- Click on the “+ Add a schedule” button.
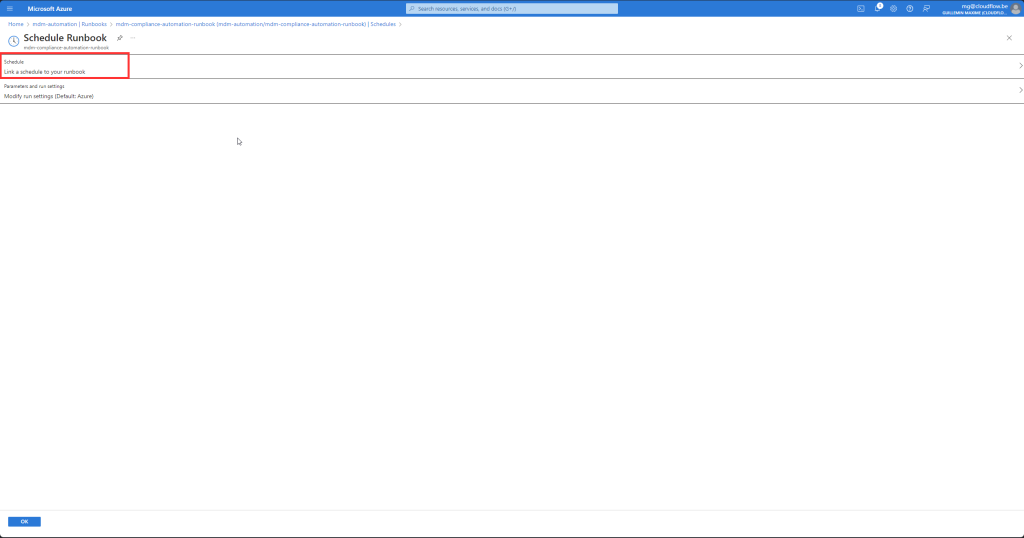
- Create a New Schedule:
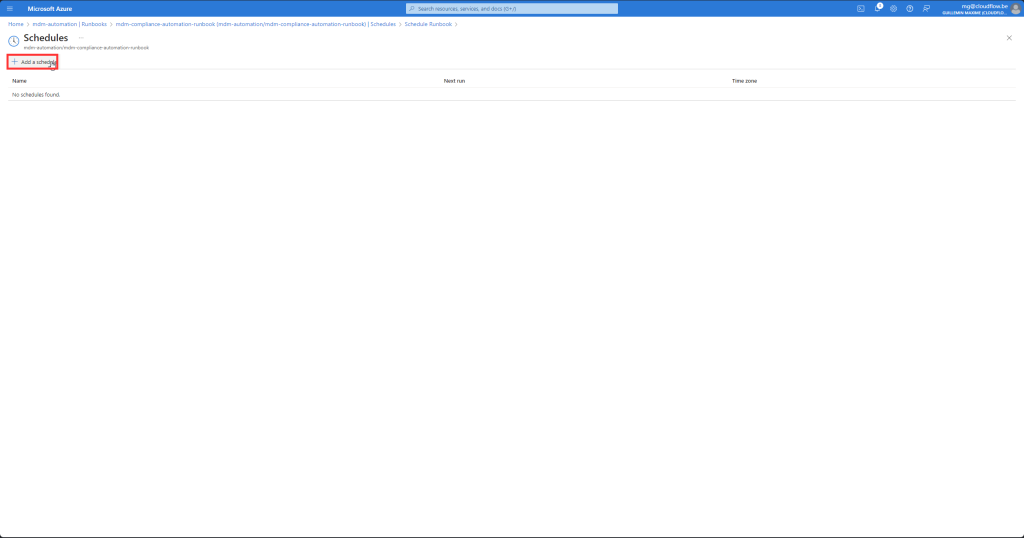
- In the “Add a schedule” blade, click on “+ Add a new schedule”.
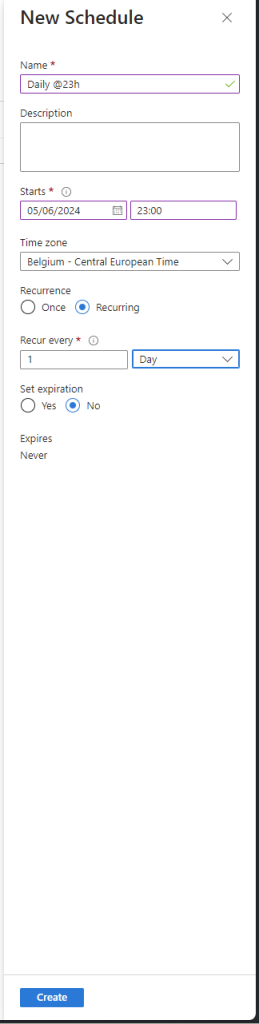
- Provide the following details:
- Name: Enter a name for the schedule.
- Description (optional): Enter a description for the schedule.
- Start time: 23:30.
- Time zone: Select the appropriate time zone.
- Recurrence: Daily
- Click “Create” to create the schedule.
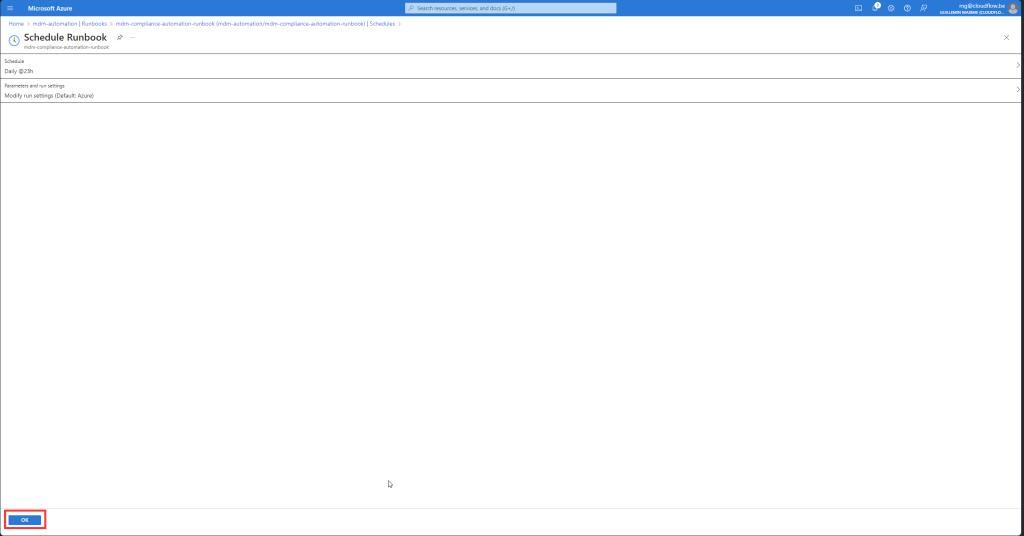
- Link the Schedule to the Runbook:
- After creating the schedule, it will appear in the “Link to schedule” blade.
- Optionally, you can specify parameters for the runbook if it requires them.
- Click “OK” to link the schedule to the runbook.
- Verify the Schedule:
- Back in the runbook’s “Schedules” section, you should see the newly created schedule listed.
- Ensure that the schedule is enabled and correctly configured.
By following these steps, you can easily add a schedule to your Azure Automation runbook, allowing you to automate tasks at specified times or intervals. This helps in ensuring that routine tasks are executed consistently and on time without manual intervention.
Intune & Testing
Findings
We’ve now successfully set up the Windows Update ring and created a resource group in Azure. Within this resource group, we deployed and configured our managed identity and automation account. Here’s a step-by-step breakdown of the process:
- Intune Current Config: Before running the script for the first time go and check compliance policy’s and Filters .
- Manual Script Execution: Perform a manual run of the script within the automation account.
- Intune Verification: After running the script, go back to Intune to verify the results.
At the time of writing, the process should have resulted in the creation of:
- 5 Filters
- 5 Compliance Policies
Each compliance policy should be assigned to the same groups as your Windows Update ring, but with its matching filter. This ensures that devices always have the correct compliance policy assigned.
By following these steps, you ensure your devices are properly managed and compliant with the desired configurations.
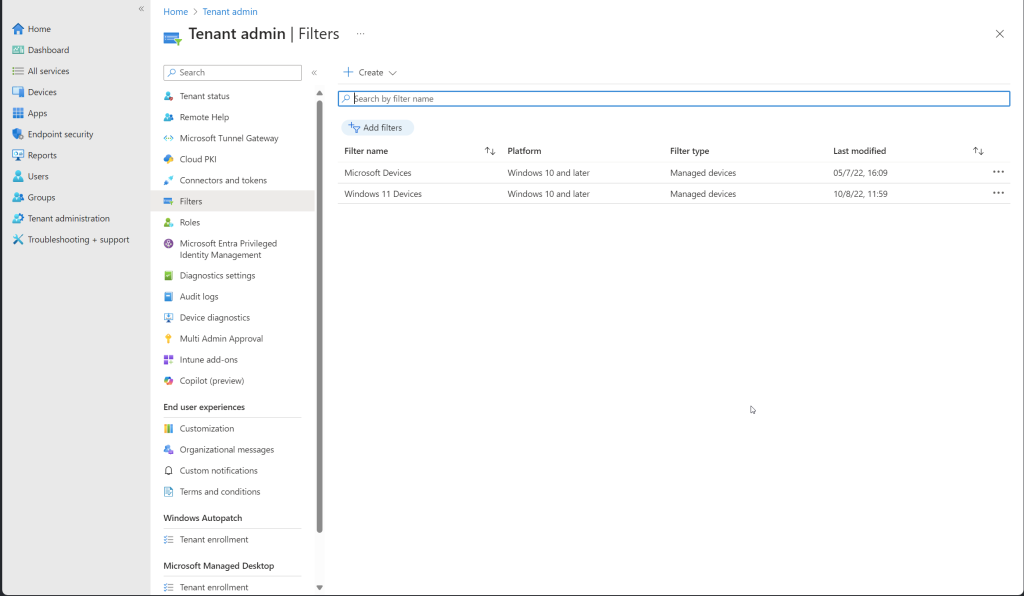
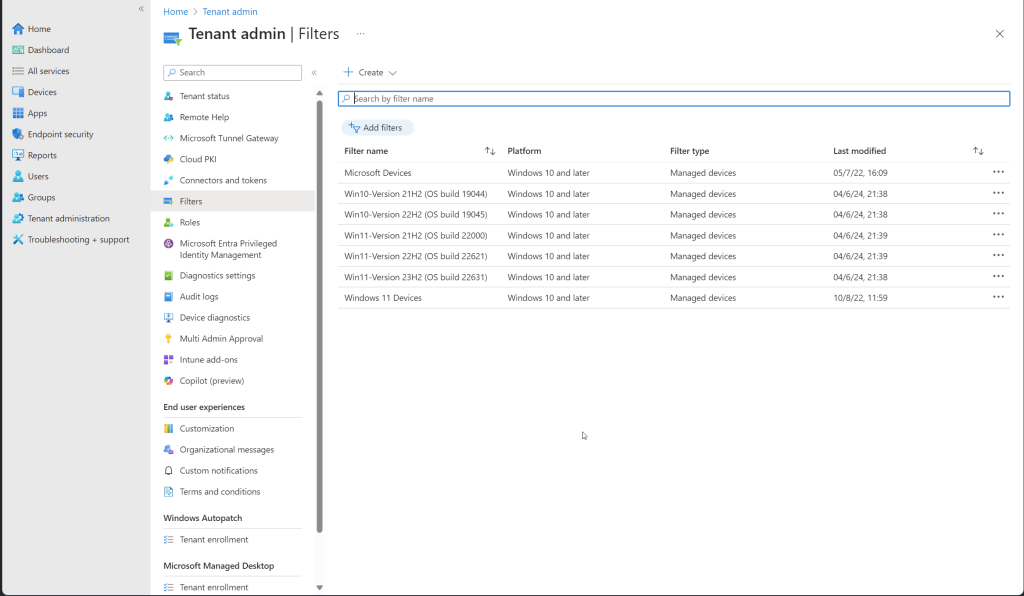
Filters
Navigate to Tenant Administration:
- In the left-hand navigation pane, select Tenant administration.
Access Filters:
- Under the Customization section, select Filters.
View and Manage Filters:
- In the filters section, you can see all the existing filters that have been created.
Before script
After script

Compliance Policy
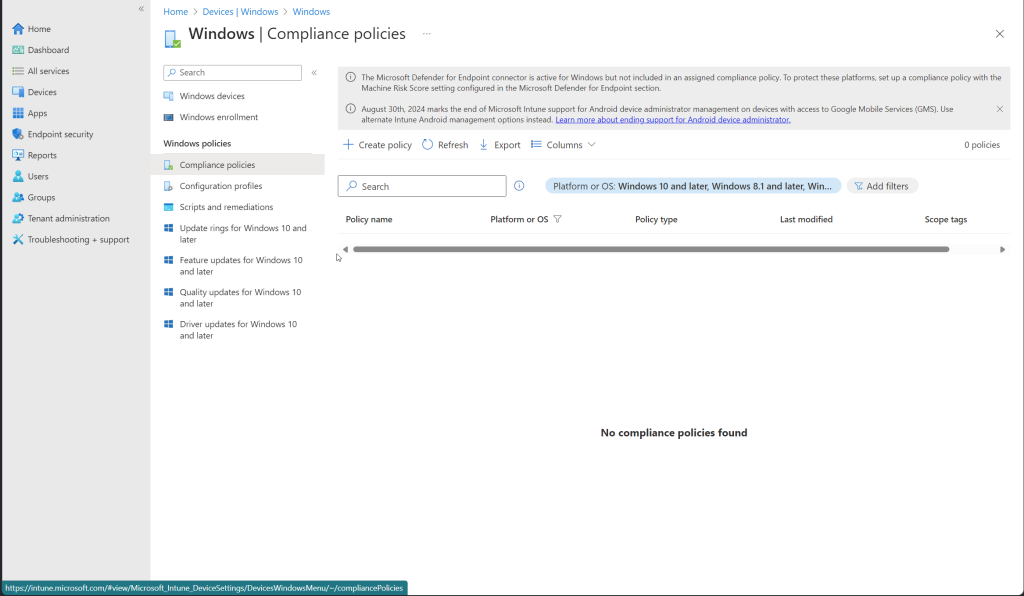
Navigate to Devices:
- In the left-hand navigation pane, select Devices.
Access Compliance Policies:
- Under the Policy section, select Compliance policies.
View and Manage Windows Compliance Policies:
- In the compliance policies section, you can see all the existing compliance policies.
- To specifically view Windows compliance policies, you can filter by Platform. Select Windows from the filter options
Before script
After script


Thorough Testing
If you’re interested in doing some additional testing, try experimenting with the assignments on the Windows Update ring. You will notice that it updates the compliance policy site. Additionally, if you add an extra group to the compliance policy, you will see that by the next run, the group will be removed from the policy.
Also, adjust the minimum OS version setting, and you should see the changes reflected. One side note: if you are testing between the release date and the deadline day, this setting will not update. Keep this in mind while testing.
Did you have an oopsie ?
Don’t worry, I’ve got you covered. Here is a cleanup script to delete all created compliance policies and filters.
# Define some parameters and default values for the script
$miAppId = ""  # Application ID for Azure AD
$cpprefix = "CP-OS-Update"  # Prefix for compliance policy names
$windowsupdateringname = "Windows Update Ring 1"  # Prefix for Windows Update ring names
$OsNames = @("Win10", "Win11")  # Operating system names to process (default is Win10 if not stated)
$osversion = "*"  # OS version (mandatory parameter, e.g., 22H2)
$latestreleases = "1"  # Number of latest releases to consider (default is 2)

# Log in to Azure AD using the provided application ID
Write-Output "Connecting to azure via Connect-AzAccount -Identity -AccountId $miAppId..."
Connect-AzAccount -Identity -AccountId $miAppId | Out-Null

# Function to get an access token for Microsoft Graph API using managed identity
function Get-GraphAPIAccessTokenPost {
    $url = $env:IDENTITY_ENDPOINT
    $headers = @{
        'Metadata'= 'True'
        'X-IDENTITY-HEADER' = $env:IDENTITY_HEADER
    }
    $body = @{
        'resource'='https://graph.microsoft.com'
        'client_id'= $miAppId
    }
    # Send POST request to get access token
    $accessToken = Invoke-RestMethod $url -Method 'POST' -Headers $headers -ContentType 'application/x-www-form-urlencoded' -Body $body
    Write-Output $accessToken.access_token
}

# Function to get data from Microsoft Graph API
function Get-graphdata {
    param(
        [Parameter(Mandatory=$true)]
        [string] $graphToken,
        [string] $url
    )
    $authHeader = @{
        'Authorization' = "$graphToken"
        'Content-Type'  = 'application/json'
    }
    $retryCount = 0
    $maxRetries = 3
    $Results = @()

    # Loop to handle retries
    while ($retryCount -le $maxRetries) {
        try {
            do {
                # Send GET request to Microsoft Graph API
                $response = Invoke-WebRequest -Uri $url -Method Get -Headers $authHeader -UseBasicParsing
                $pageResults = $response.Content | ConvertFrom-Json
                $retryCount = 0
                if ($pageResults.'@odata.nextLink' -ne $null) {
                    $url = $pageResults.'@odata.nextLink'
                    $results += $pageResults
                } else {
                    $results += $pageResults
                    return $results
                }
            } while ($pageResults.'@odata.nextLink')
        } catch {
            $statusCode = $_.Exception.Response.StatusCode

            if ($statusCode -in $retryStatusCodes) {
                $retryCount++
                $retryAfter = [int]($_.Exception.Response.Headers.'Retry-After')
                $sleepcount = if ($retryAfter) { $retryAfter } else { $retryCount * $global:apiTtimeout }
                Start-Sleep -Seconds $sleepcount
            } elseif ($statusCode -in $statusCodesObject.code) {
                return $null
            } else {
                Write-Error "$($_.Exception)"
                return $null
            }
        }
    }
}

# Function to delete data using DELETE method in Microsoft Graph API
function Delete-GraphData {
    param(
        [Parameter(Mandatory=$true)]
        [string] $graphToken,

        [Parameter(Mandatory=$true)]
        [string] $url
    )
    $authHeader = @{
        'Authorization' = "$graphToken"
        'Content-Type'  = 'application/json'
    }
    $retryCount = 0
    $maxRetries = 3

    # Loop to handle retries
    while ($retryCount -le $maxRetries) {
        try {
            # Send DELETE request to Microsoft Graph API
            $response = Invoke-RestMethod -Uri $url -Method DELETE -Headers $authHeader -Body $body -ContentType "application/json"
            return $response
        } catch {
            $statusCode = $_.Exception.Response.StatusCode
            if ($statusCode -eq 429) { # Too many requests
                $retryCount++
                $retryAfter = [int]($_.Exception.Response.Headers.'Retry-After')
                $sleepcount = if ($retryAfter) { $retryAfter } else { $retryCount * 10 } # Default backoff if Retry-After not available
                Write-Warning "API call returned error $statusCode. Too many requests. Retrying in $($sleepcount) seconds."
                Start-Sleep -Seconds $sleepcount
            } elseif ($statusCode -eq 503) { # Service unavailable
                $retryCount++
                $sleepcount = $retryCount * 10
                Write-Warning "API call returned error $statusCode. Service unavailable. Retrying in $($sleepcount) seconds."
                Start-Sleep -Seconds $sleepcount
            } else {
                Write-Error "API call returned error $statusCode."
                return $null
            }
        }
    }
    Write-Warning "Max retry attempts reached."
    return $null
}


$WindowUpdateCatalog = $OsNames | ForEach-Object {
    $os = $_
    $osbuilds = Get-LatestOSBuild -OSName $os -OSversion $osversion -LatestReleases $latestreleases -ExcludePreview
    $osbuilds | ForEach-Object {
        $osVersions = $_.Version.Substring(8, 4)
        $osVersions | ForEach-Object {
            $osbuild = Get-LatestOSBuild -OSName $os -OSversion $_ -LatestReleases 1 -ExcludePreview
            $osbuild | ForEach-Object {
                [PSCustomObject]@{
                    os = $os
                    Version = $_.Version
                    qualityUpdateVersion = "10.0."+$_.Build
                    Availability_date = $_.'Availability date'
                    Preview = $_.'Preview'
                    'Out-of-band' = $_.'Out-of-band'
                    Servicing_option = $_.'Servicing option'
                    KB_article = $_.'KB article'
                    KB_URL = $_.'KB URL'
                    Catalog_URL = $_.'Catalog URL'
                }
            }
        }
    }
}

# Filter the OS builds to include only those in the General Availability Channel
$SupportedWindowsGA = $WindowUpdateCatalog | Where-Object {$_.Servicing_option -like "*General Availability Channel*"}

# Get the Graph API access token
$graphToken = Get-GraphAPIAccessTokenPost -TenantID $tenantId -ClientID $app_id -ClientSecret $app_secret
# Retrieve all device compliance policies from Graph API
$allcompliancypollicy = Get-graphdata -graphToken $graphToken -url "https://graph.microsoft.com/beta/deviceManagement/deviceCompliancePolicies?&`$expand=assignments"

# Filter to get only Windows 10 compliance policies that match the compliance policy prefix
$windowsupdatecompliancepllicy = $allcompliancypollicy.value | Where-Object { $_.'@odata.type' -eq "#microsoft.graph.windows10CompliancePolicy" -and $_.displayName -like "*$($cpprefix)*"}

# Retrieve all assignment filters from Graph API
$allfilters = (Get-graphdata -graphToken $graphToken -url "https://graph.microsoft.com/beta/deviceManagement/assignmentFilters").value

# Filter the assignment filters to include only those for specific OS versions
$osversionfilters = $allfilters | Where-Object {$_.displayName -like "Win11-Version*" -or $_.displayName -like "Win10-Version*" -and $_.displayName -like "*(OS build*"}


$windowsupdatecompliancepllicy | ForEach-Object{
    Delete-GraphData -graphToken $graphToken -url "https://graph.microsoft.com/beta/deviceManagement/deviceCompliancePolicies/$($_.id)"
}

$osversionfilters | ForEach-Object{
    Delete-GraphData -graphToken $graphToken -url "https://graph.microsoft.com/beta/deviceManagement/assignmentFilters/$($_.id)"
}
Conclusion
Managing compliance and Windows updates across an organization’s devices can be a daunting task. However, by leveraging the power of Microsoft Intune, Azure, PowerShell, and Graph API, you can significantly streamline this process. Automating the creation and maintenance of compliance policies and update rings ensures that your devices remain up-to-date with the latest OS builds and configurations.
This guide has provided a walkthrough, covering the setup of a Windows Update ring in Intune, the creation of a resource group in Azure, the configuration of a managed identity, the assignment of necessary Graph API permissions, and the creation of an Azure Automation account. Additionally, it detailed the integration of the WindowsOSBuild module and the development of a PowerShell runbook to automate compliance policy updates.
While this guide demonstrated the process with a single update ring, adapting the script to work with multiple update rings is straightforward and can provide a more robust solution tailored to your organization’s needs. The flexibility of this approach allows you to expand and customize the automation process as required.
By implementing these steps, you can reduce the risk of non-compliance, minimize manual intervention, and maintain a secure and efficient IT environment. Automation not only enhances the reliability and stability of your IT operations.
Whether managing a small set of devices or a large enterprise environment, this approach offers a scalable solution to keep your systems compliant and up-to-date. Embrace automation to simplify your IT management tasks, allowing you to focus on more strategic initiatives that drive your organization forward.
If you have any question or problem i’m here to help.


0 Comments